🚀 First Walkthrough
After creating a bootable USB stick (Create Bootable Media) and starting the server for the first time, you will see the following on the screen:
Once the system is fully booted, the initial setup wizard is accessible through the WebUI at http://MOS-IP/.
1. 🔐 Root Password
The first step is to set the root password. This password is used for SSH and console access to the server.
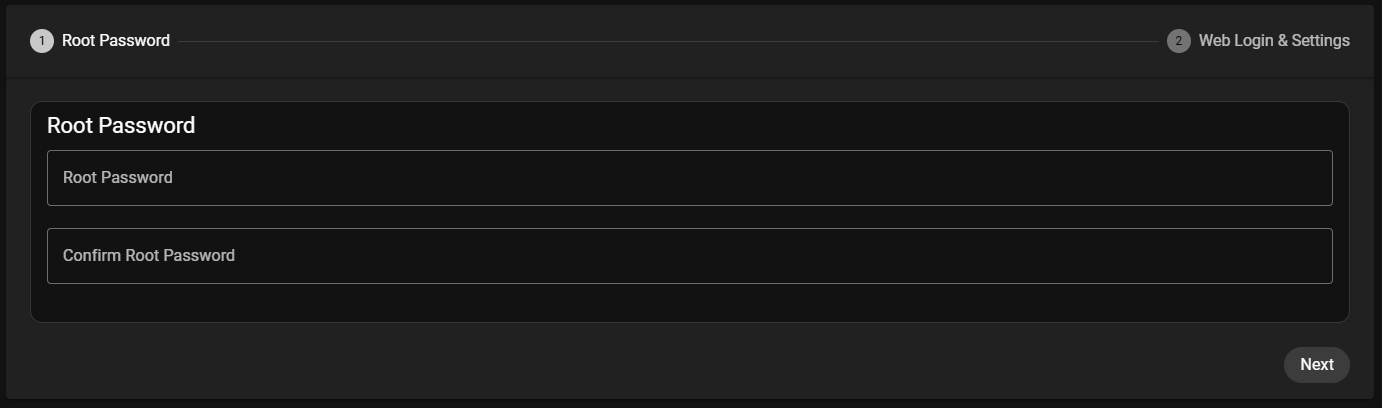
Enter and confirm the desired root password in the two input fields:
- Root Password — Enter the root password
- Confirm Root Password — Re-enter the same password for confirmation
Click Next to proceed to the next step.
The root password is required for direct system access via SSH or the physical console. The WebUI uses a separate login covered in the next step.
2. 🌐 Web Login & Settings
The second step configures the WebUI administrator account and display preferences.
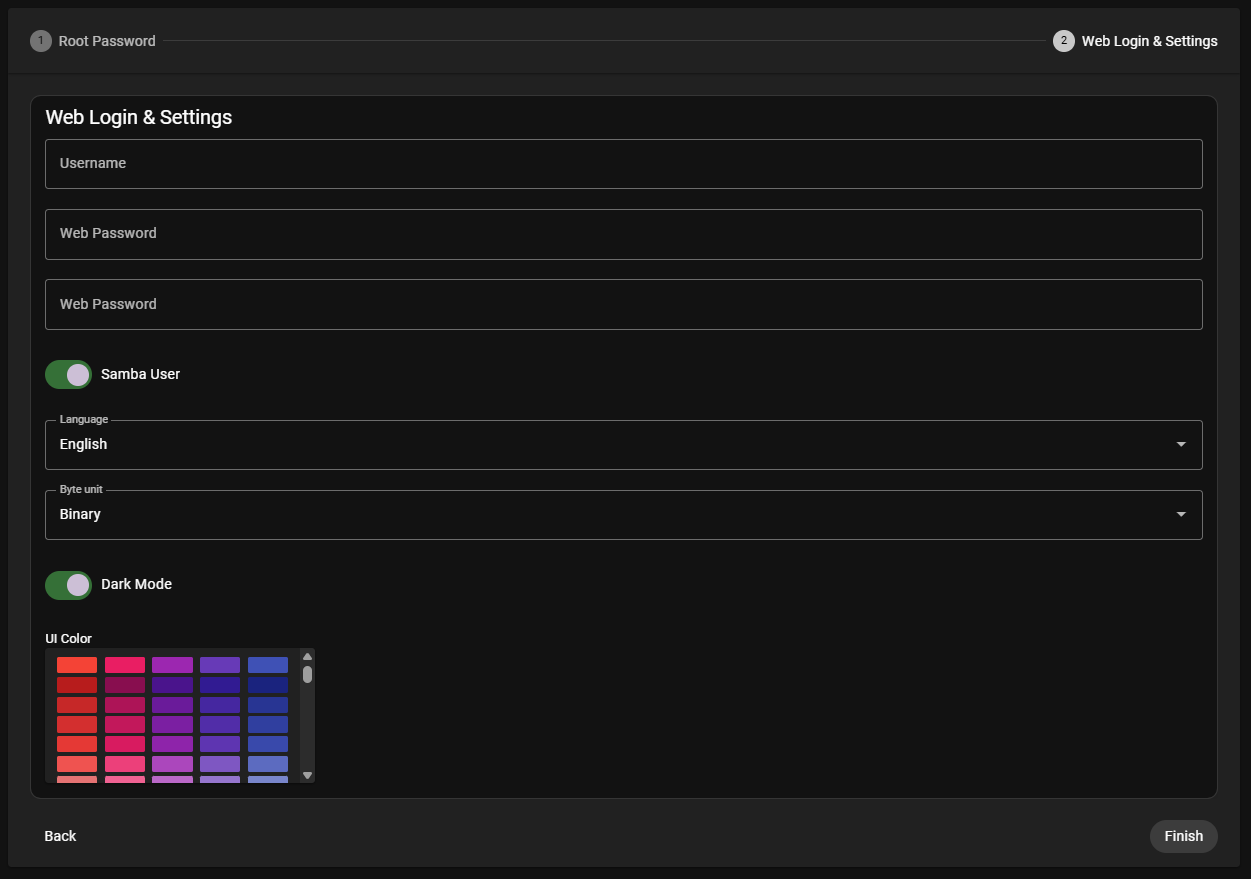
Fill in the following fields:
- Username — The WebUI administrator username
- Web Password — Password for WebUI access
- Web Password — Re-enter the same password for confirmation
Additional settings:
- Samba User — Toggle to enable Samba user functionality
- Language — Select the display language (default:
English) - Byte unit — Select byte unit format (default:
Binary) - Dark Mode — Toggle to enable dark mode interface
- UI Color — Choose the primary UI color from the color palette
Click Finish to complete the initial setup.
3. 🔑 Login
After completing the setup wizard, you are redirected to the MOS Portal login screen.
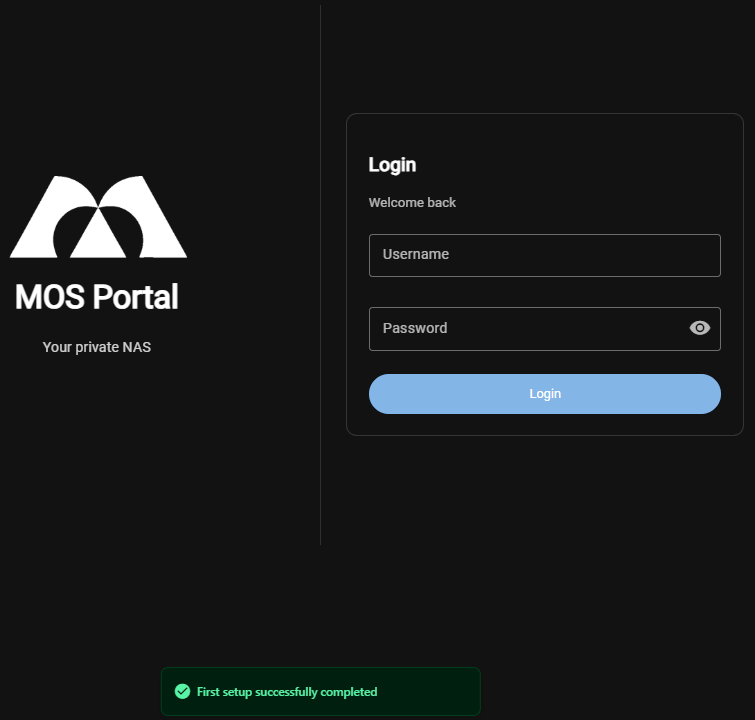
A notification appears at the bottom confirming:
✅ First setup successfully completed
Enter your credentials to log in:
- Username — The WebUI administrator username configured in the previous step
- Password — The WebUI password configured in the previous step
Click Login to access the MOS WebUI.
4. 📊 Dashboard
After logging in, you are taken to the MOS Dashboard which provides an overview of your system.
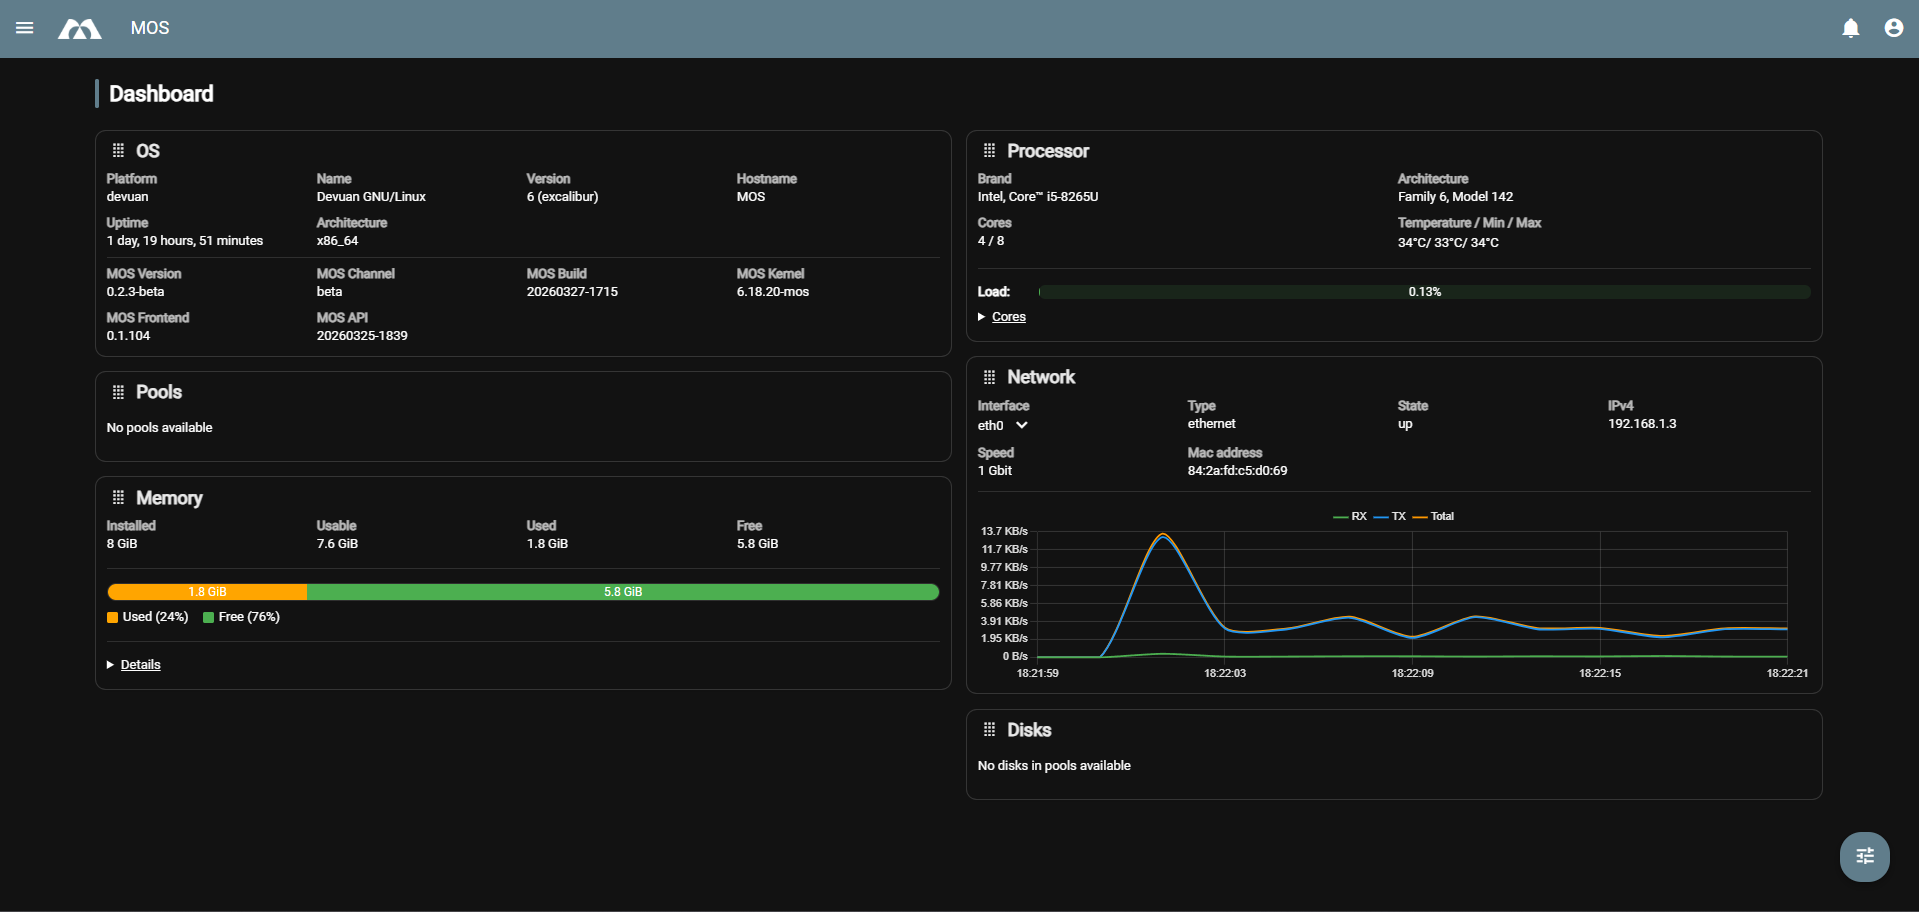
The Dashboard displays the following information:
- OS — System information including platform, name, version, hostname, uptime, architecture, MOS version, channel, build, kernel, frontend, and API version
- Processor — CPU details including brand, architecture, cores, temperature, and current load
- Pools — Storage pool status (currently showing "No pools available")
- Network — Network interface information including type, state, IPv4 address, speed, and MAC address with a traffic graph
- Memory — Memory usage statistics showing installed, usable, used, and free memory with a visual bar
- Disks — Disk status (currently showing "No disks in pools available")
5. 🌐 Network Configuration
One of the first settings to configure is the network interface. Click the menu icon (three horizontal lines) in the top-left corner to open the sidebar navigation.
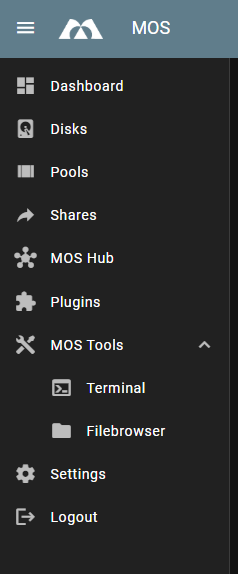
Select Settings from the menu to access the system configuration page.
Navigate to Network → Network Interfaces to configure your network adapter.
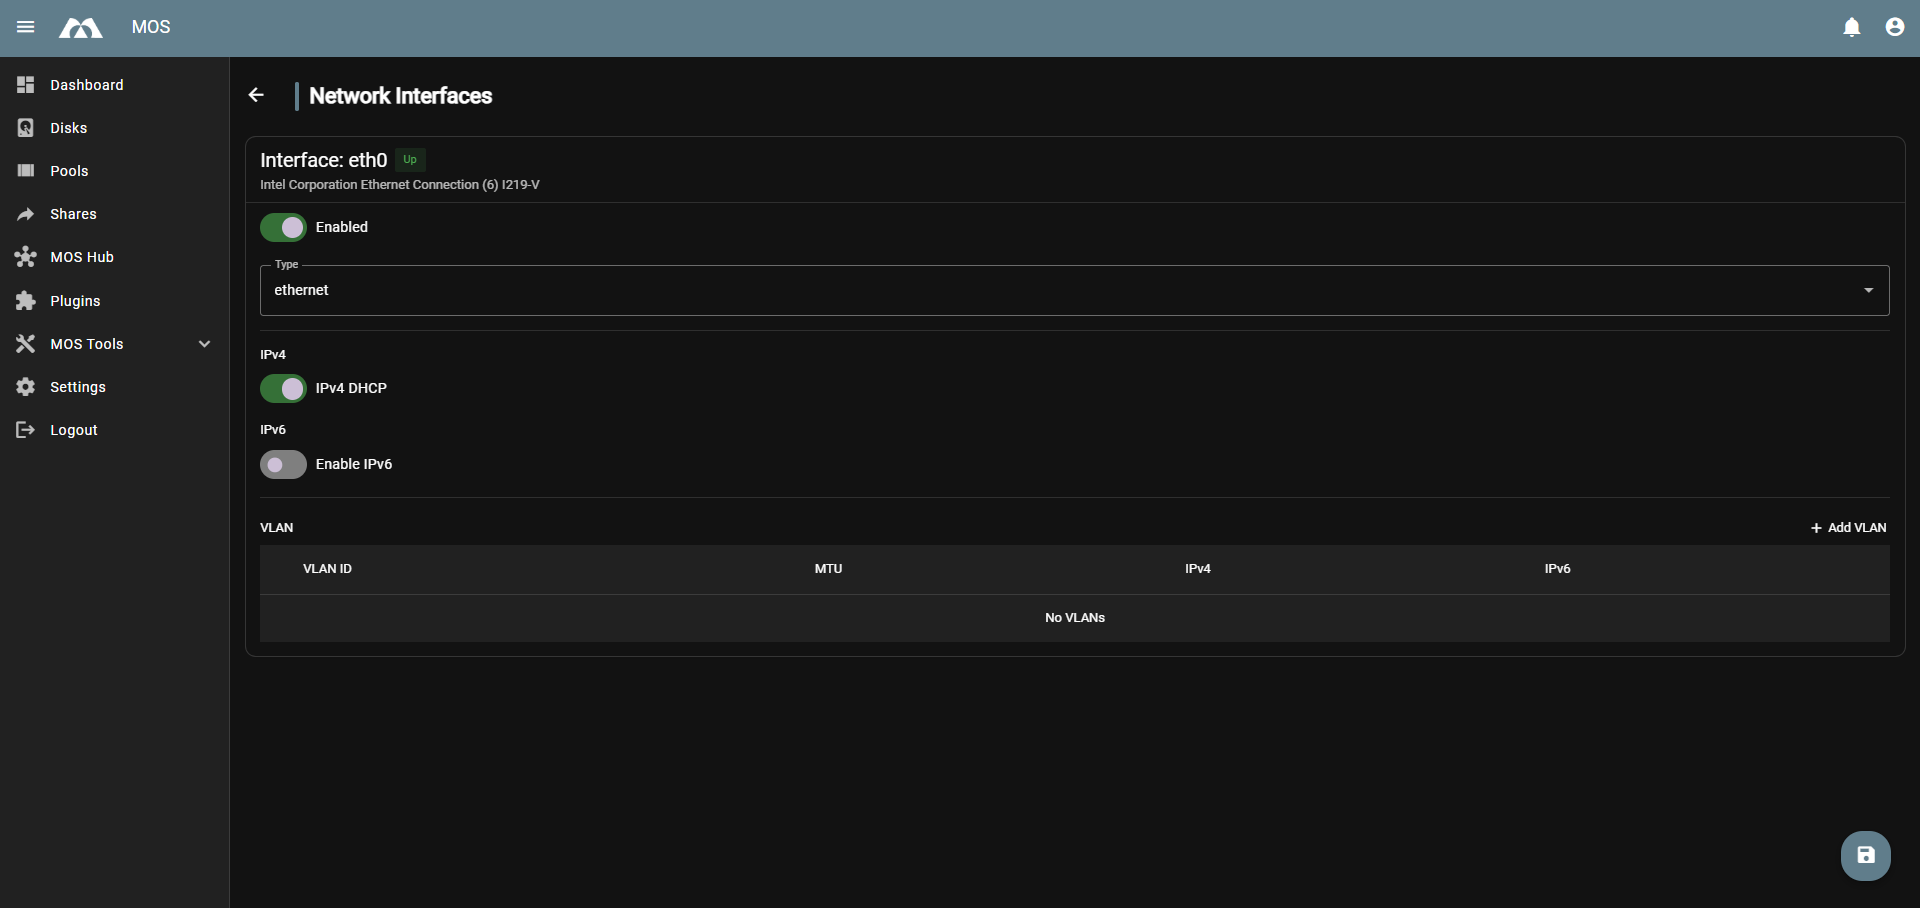
The Network Interfaces page allows you to configure:
- Interface — The physical network interface (e.g.,
eth0) - Enabled — Toggle to enable or disable the interface
- Type — Select the interface type (
ethernetorbridged) - IPv4 DHCP — Toggle automatic IP assignment via DHCP
- Enable IPv6 — Toggle IPv6 support
When applying network changes, MOS protects you from accidental lockouts.
After applying a new network configuration:
- MOS starts a 60 second confirmation timer
- You must click Accept to confirm the new configuration
If the configuration is not confirmed within 60 seconds:
- The previous network configuration will be automatically restored
This prevents losing access to the WebUI due to incorrect network settings.
For detailed network configuration options, including static IP assignment, VLANs, and advanced settings, refer to the Network Configuration documentation.
5.1 🌐 GitHub Token Setup
To improve reliability and avoid GitHub API rate limits when downloading templates and containers, configure a GitHub Personal Access Token in MOS.
Settings → Network → Token
Example:
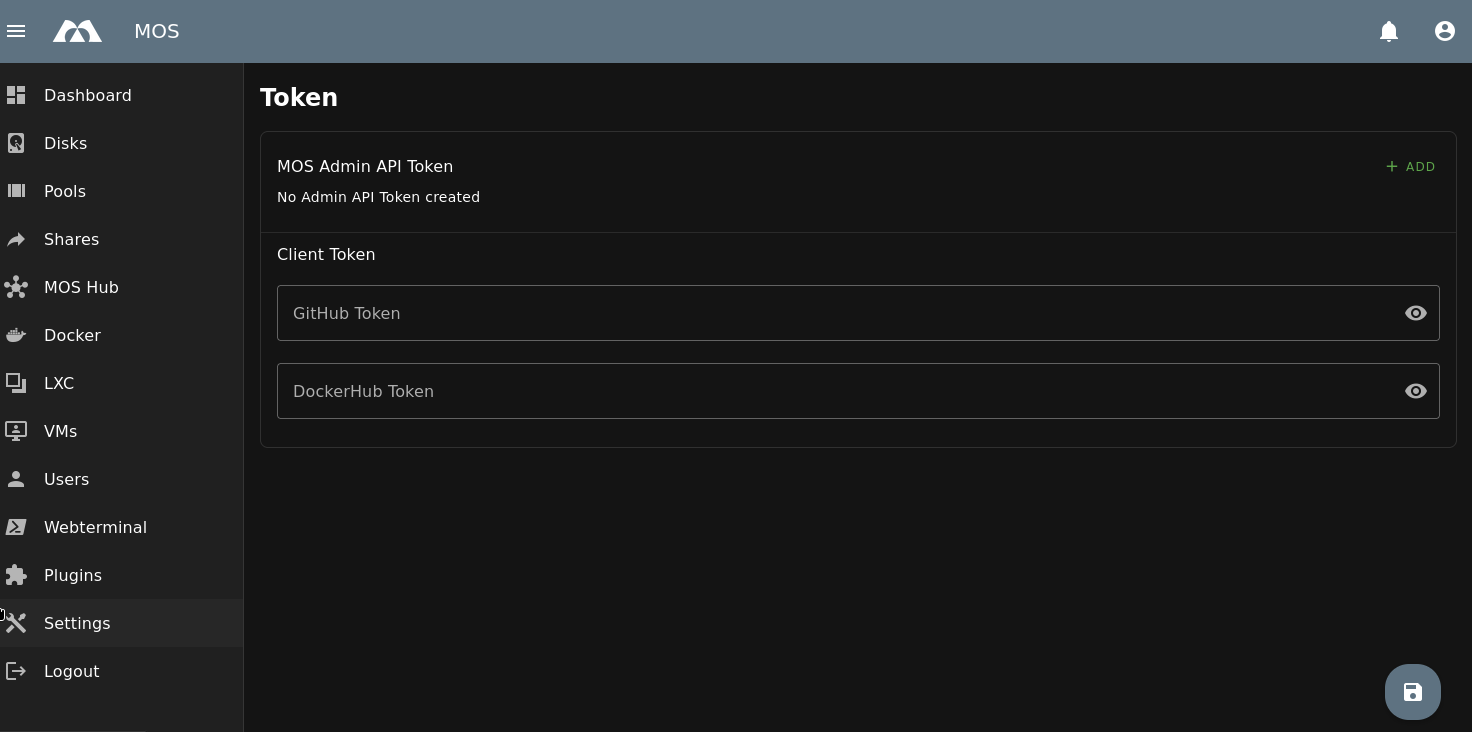
GitHub Token Setup
- Log in to GitHub
- Click your profile picture (top right)
- Select Settings
- Scroll down and open Developer settings
- Go to Personal access tokens
- Select Fine-grained tokens
- Click Generate new token
- Expiration: No expiration
- Repository access: Public repositories (Read-only access to public repositories)
Token Usage in MOS
- Copy the generated token
- Paste the token directly into the GitHub Token field in MOS (found under Settings → Network → Token)
- Avoids GitHub API rate limits
- Improves reliability of template and container downloads
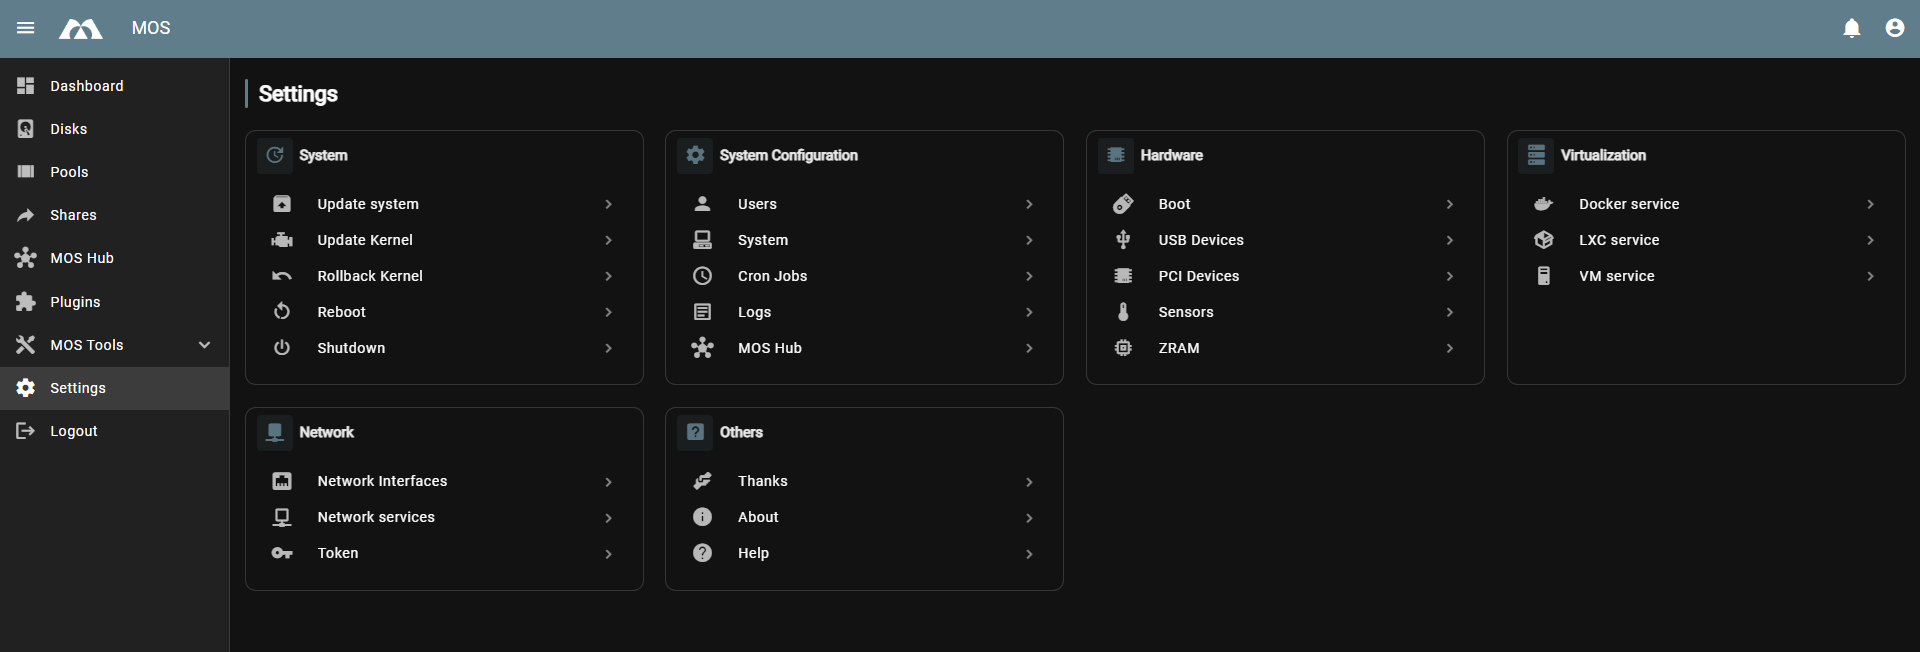
6. ⚙️ System Settings
The System Settings page contains essential system configuration options. Navigate to Settings → System Configuration → System to access these settings.
6.1 🖥️ General Settings
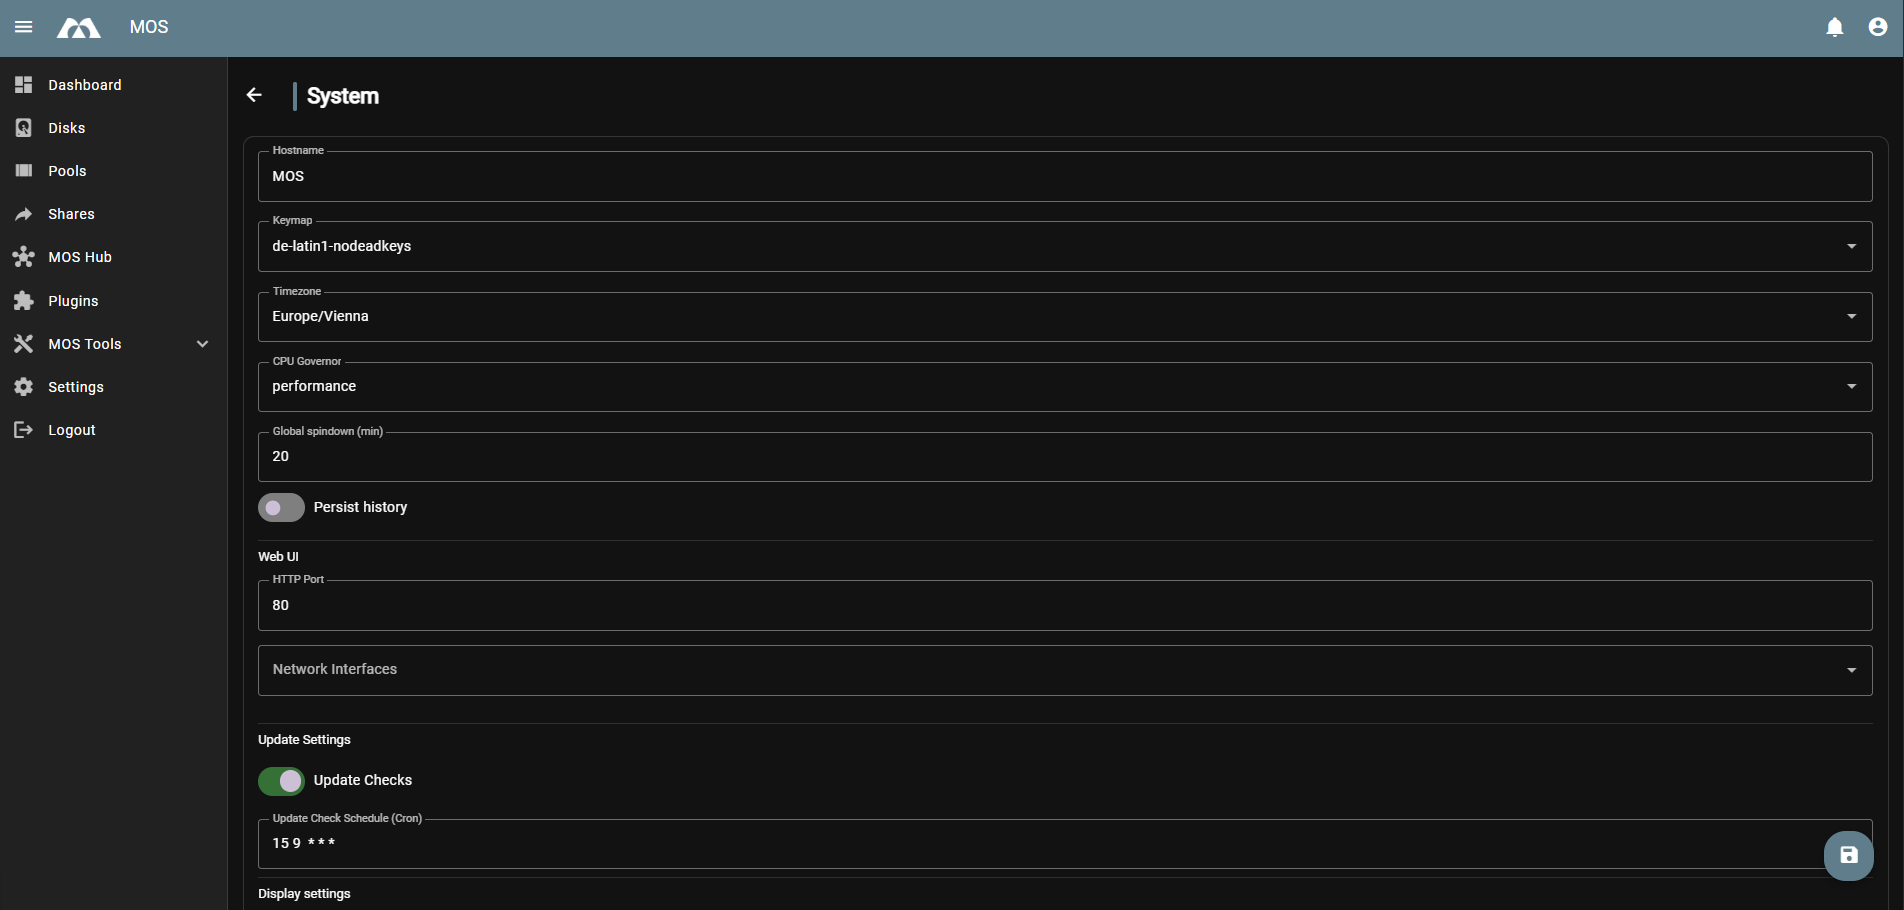
Configure basic system parameters:
- Hostname — The system hostname (default:
MOS) - Keymap — Keyboard layout for console access (default:
de-latin1-nodeadkeys) - Timezone — System timezone (default:
Europe/Vienna) - CPU Governor — CPU frequency scaling policy (default:
performance) - Global Spindown — Disk idle time before spin-down in minutes (default:
20) - Persist History — Toggle to preserve command history across reboots
- Web UI HTTP Port — The port for the WebUI (default:
80) - Network Interfaces — Select which network interface to use for the WebUI
6.2 🔊 Display & Notification Sound
Configure display and notification behavior:
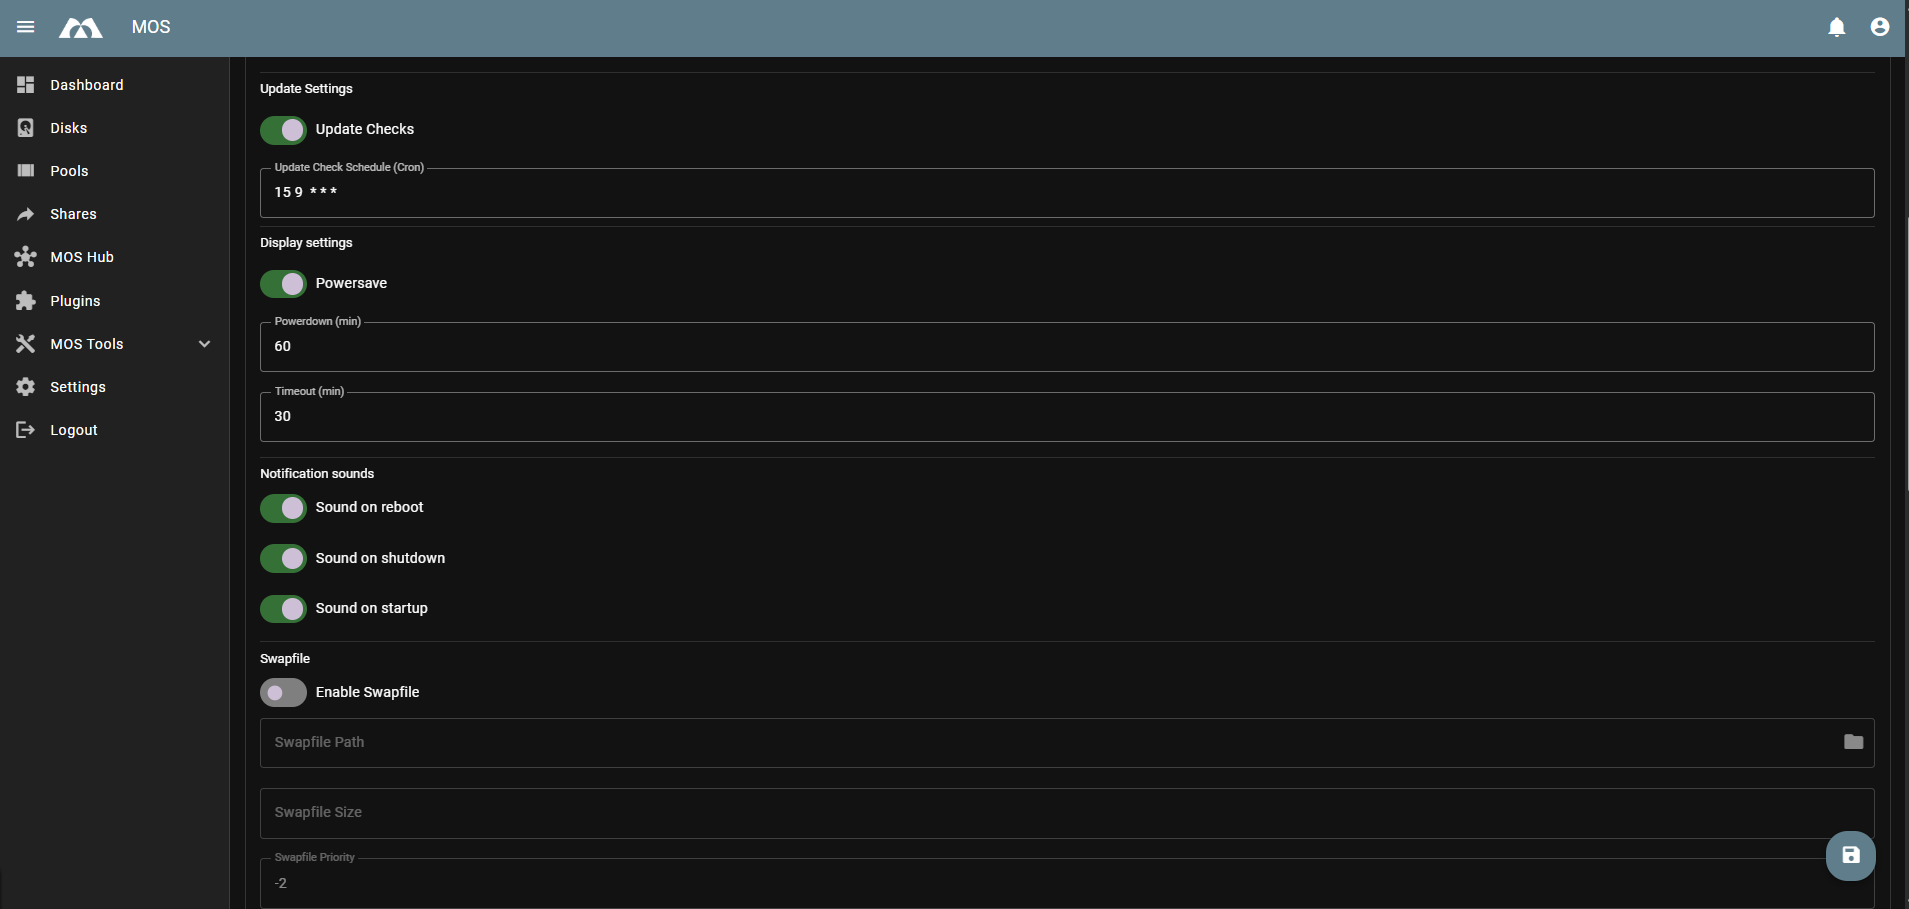
Update Settings:
- Update Checks — Enable automatic update checking
- Update Check Schedule — Define when update checks occur
Display Settings:
- Powersave — Enable display power-saving mode
- Powerdown — Time before display powers down in minutes (default:
60) - Timeout — UI inactivity timeout in minutes (default:
30)
Notification Sounds:
- Sound on reboot — Play sound when system reboots
- Sound on shutdown — Play sound when system shuts down
- Sound on startup — Play sound when system starts
6.3 💾 Memory & Binary Format Settings
Configure memory management and binary format support:
Swapfile:
- Enable Swapfile — Use a swap file for additional virtual memory
- Swapfile Path — Location of the swap file
- Swapfile Size — Size of the swap file
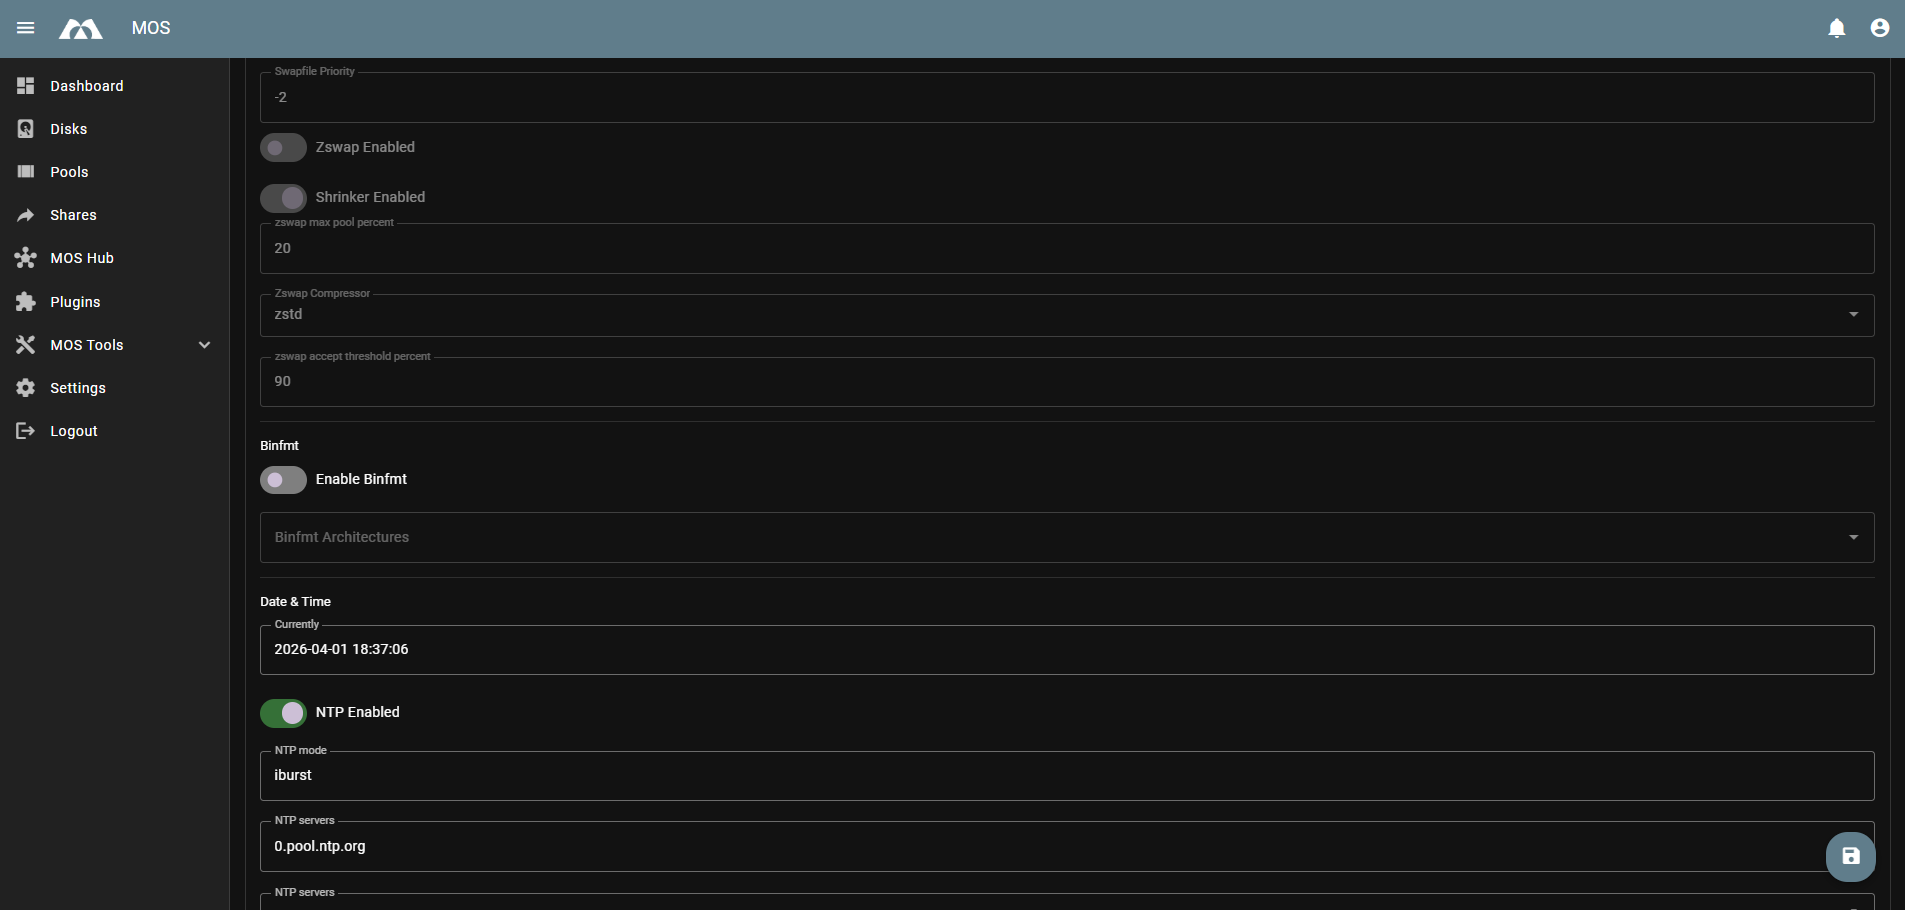
- Swapfile Priority — Priority relative to other swap devices (default:
-2)
Zswap:
- Zswap Enabled — Compress memory pages before swapping
- Shrinker Enabled — Enable the zswap shrinker
- Zswap Max Pool Percent — Maximum memory percentage for zswap pool (default:
20) - Zswap Compressor — Compression algorithm (default:
zstd) - Zswap Accept Threshold Percent — Threshold for accepting pages (default:
90)
Binfmt:
- Enable Binfmt — Support for additional binary formats
- Binfmt Architectures — Supported additional architectures
6.4 🕐 Time & Proxy Settings
Configure time synchronization and network proxy:
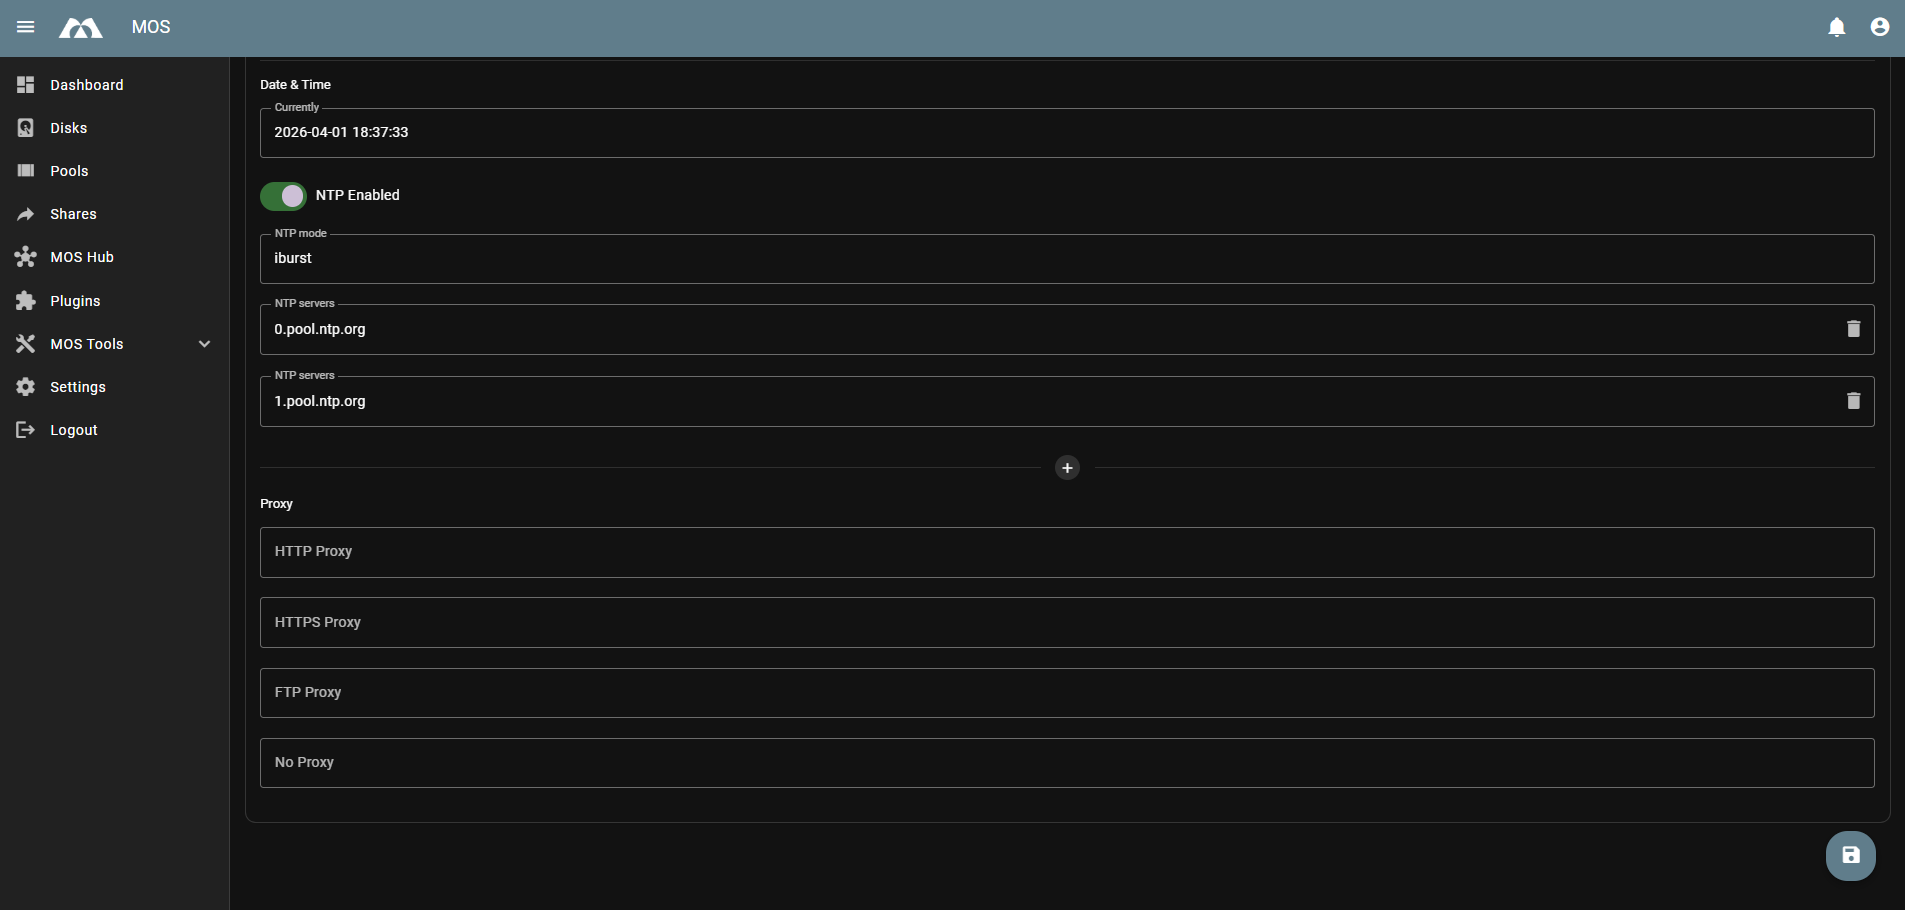
Date & Time:
- Currently — Shows the current system date and time
- NTP Enabled — Enable network time synchronization
- NTP Mode — Synchronization mode (default:
iburst) - NTP Servers — List of NTP servers for time sync (default:
0.pool.ntp.org,1.pool.ntp.org)
Proxy:
- HTTP Proxy — HTTP proxy server address
- HTTPS Proxy — HTTPS proxy server address
- FTP Proxy — FTP proxy server address
- No Proxy — Addresses/domains that bypass the proxy
For detailed information about all system settings, refer to the System Settings documentation.
7. 🛍️ MOS Hub
The MOS Hub is an integrated application hub similar to an app store for MOS. It provides access to plugins, Docker templates, and Docker Compose templates that can be deployed directly from the WebUI.
Navigate to Settings → System Configuration → MOS Hub Settings to configure the hub.
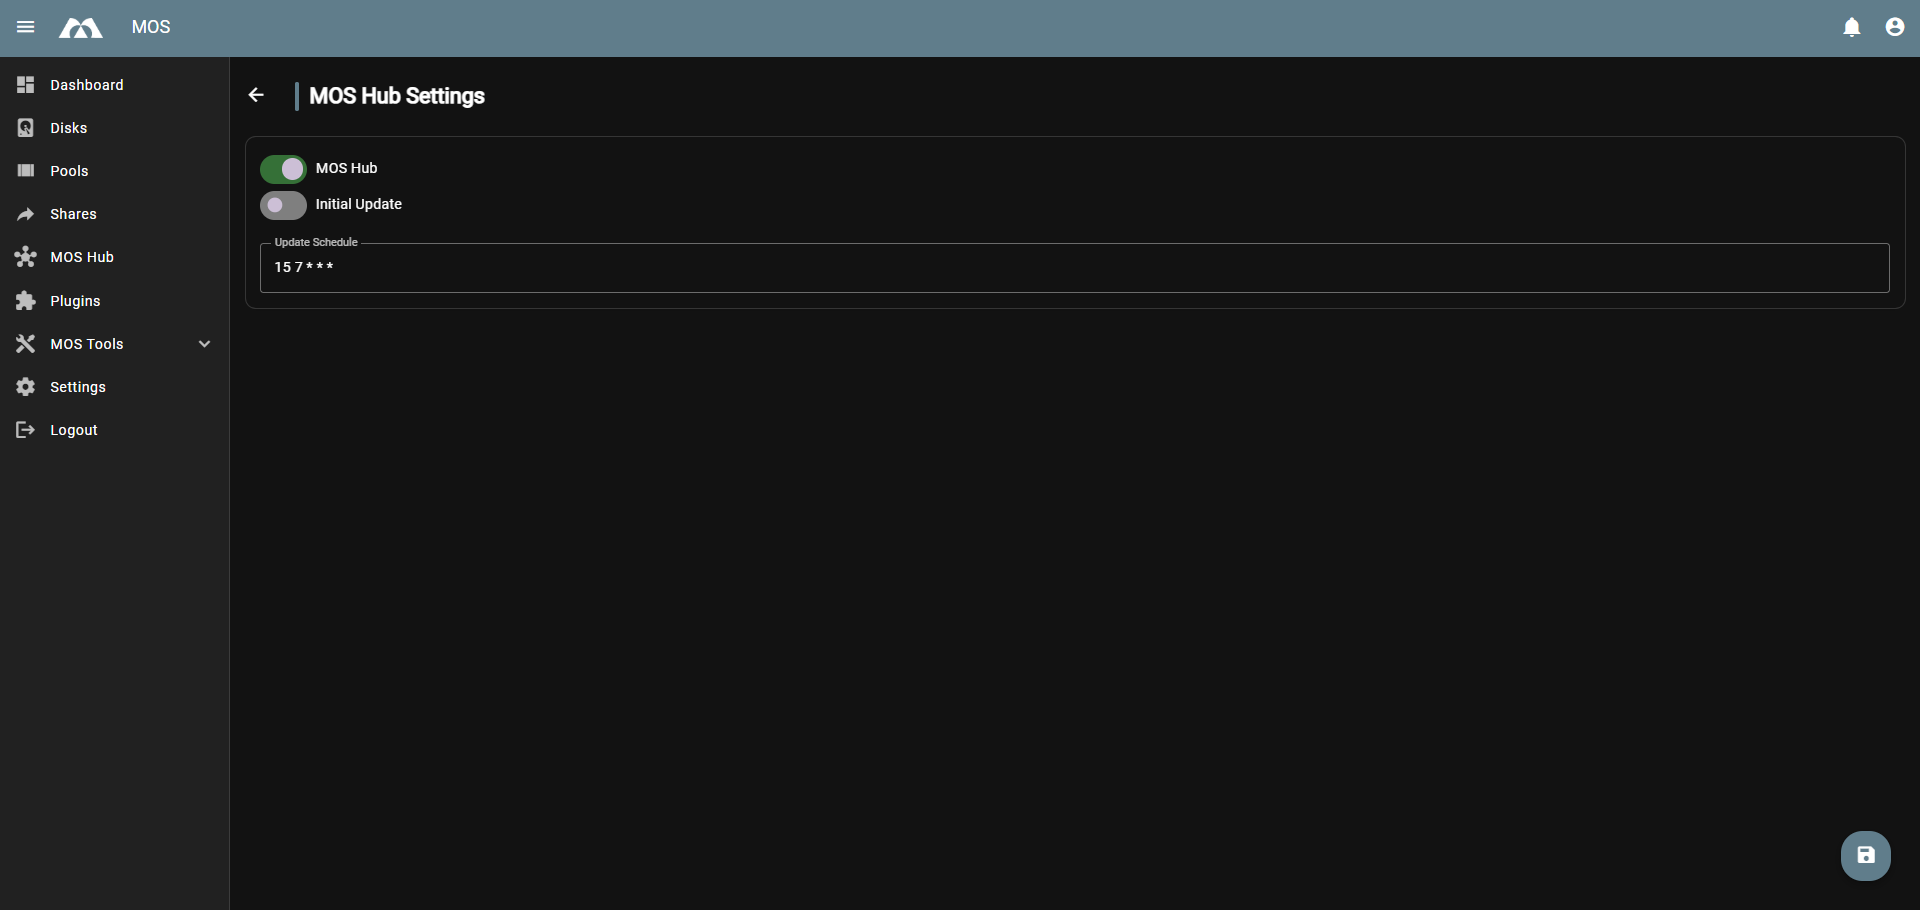
Configure the MOS Hub settings:
- MOS Hub — Toggle to enable or disable the integrated MOS Hub
- Initial Update — Toggle automatic refresh of repositories on each new session (login or new WebUI session)
- Update Schedule — Define when the MOS Hub automatically updates using cron syntax (default:
15 7 * * *— every day at 07:15)
For detailed information about the MOS Hub, including how to deploy applications, refer to the MOS Hub documentation.
8. 💾 Install to Disk
If you installed MOS from a USB stick and want to permanently install it to an internal disk, use the Install to Disk option. Navigate to Settings → Hardware → Boot to access the boot configuration.
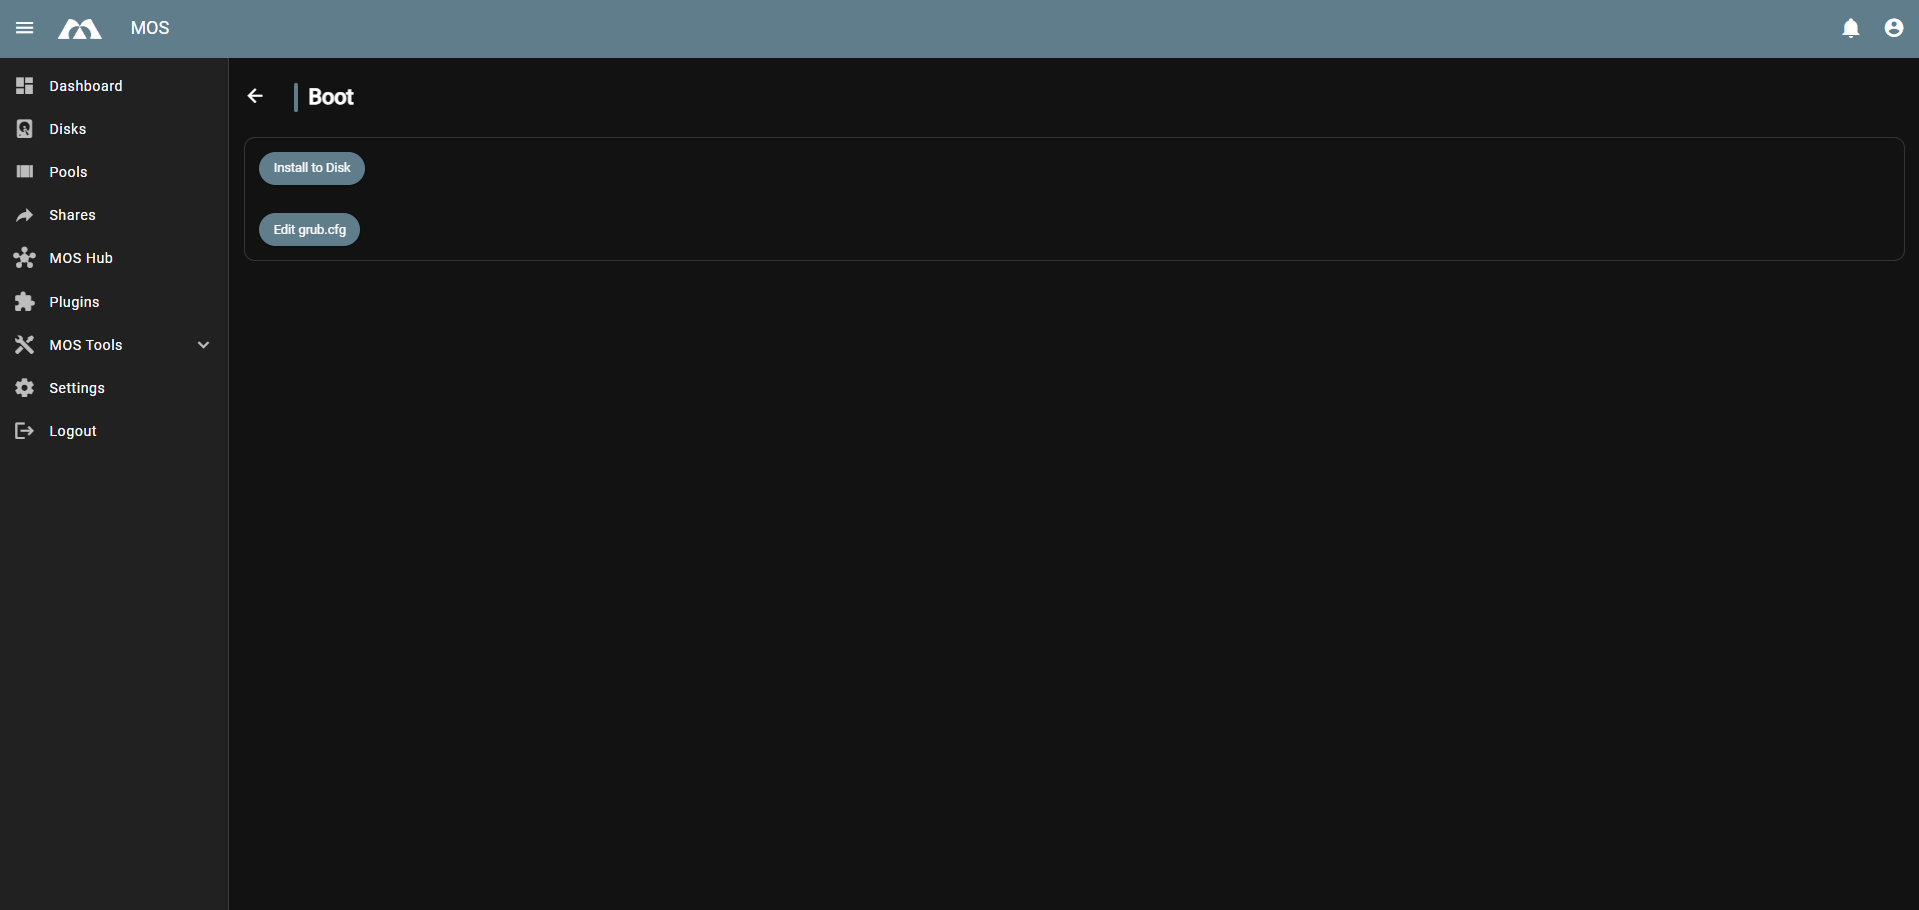
Click Install to Disk to install the system bootloader and copy the /boot contents to a selected disk.
After the installation finishes, shutdown or reboot your server immediately. All further changes after "Install to Disk" will not be saved.
The recommended procedure:
- Click Install to Disk and select your target device
- Shutdown your server
- Remove the old boot media (USB stick)
- Start your server
- Change the boot order in your BIOS if necessary to boot from the new disk
When clicking Install to Disk, you can configure:
- Device — The target disk where the bootloader will be installed
- Filesystem — The filesystem for the boot installation (ext4 recommended for HDD/SSD/NVME)
- Extra Partition — Optionally create an additional partition for storage pools, Docker data, or shares
For detailed information, refer to the Boot documentation.
9. 🔄 System Update
The System Update option allows you to update the MOS firmware to a newer version. Navigate to Settings → System → Update system to access the update dialog.
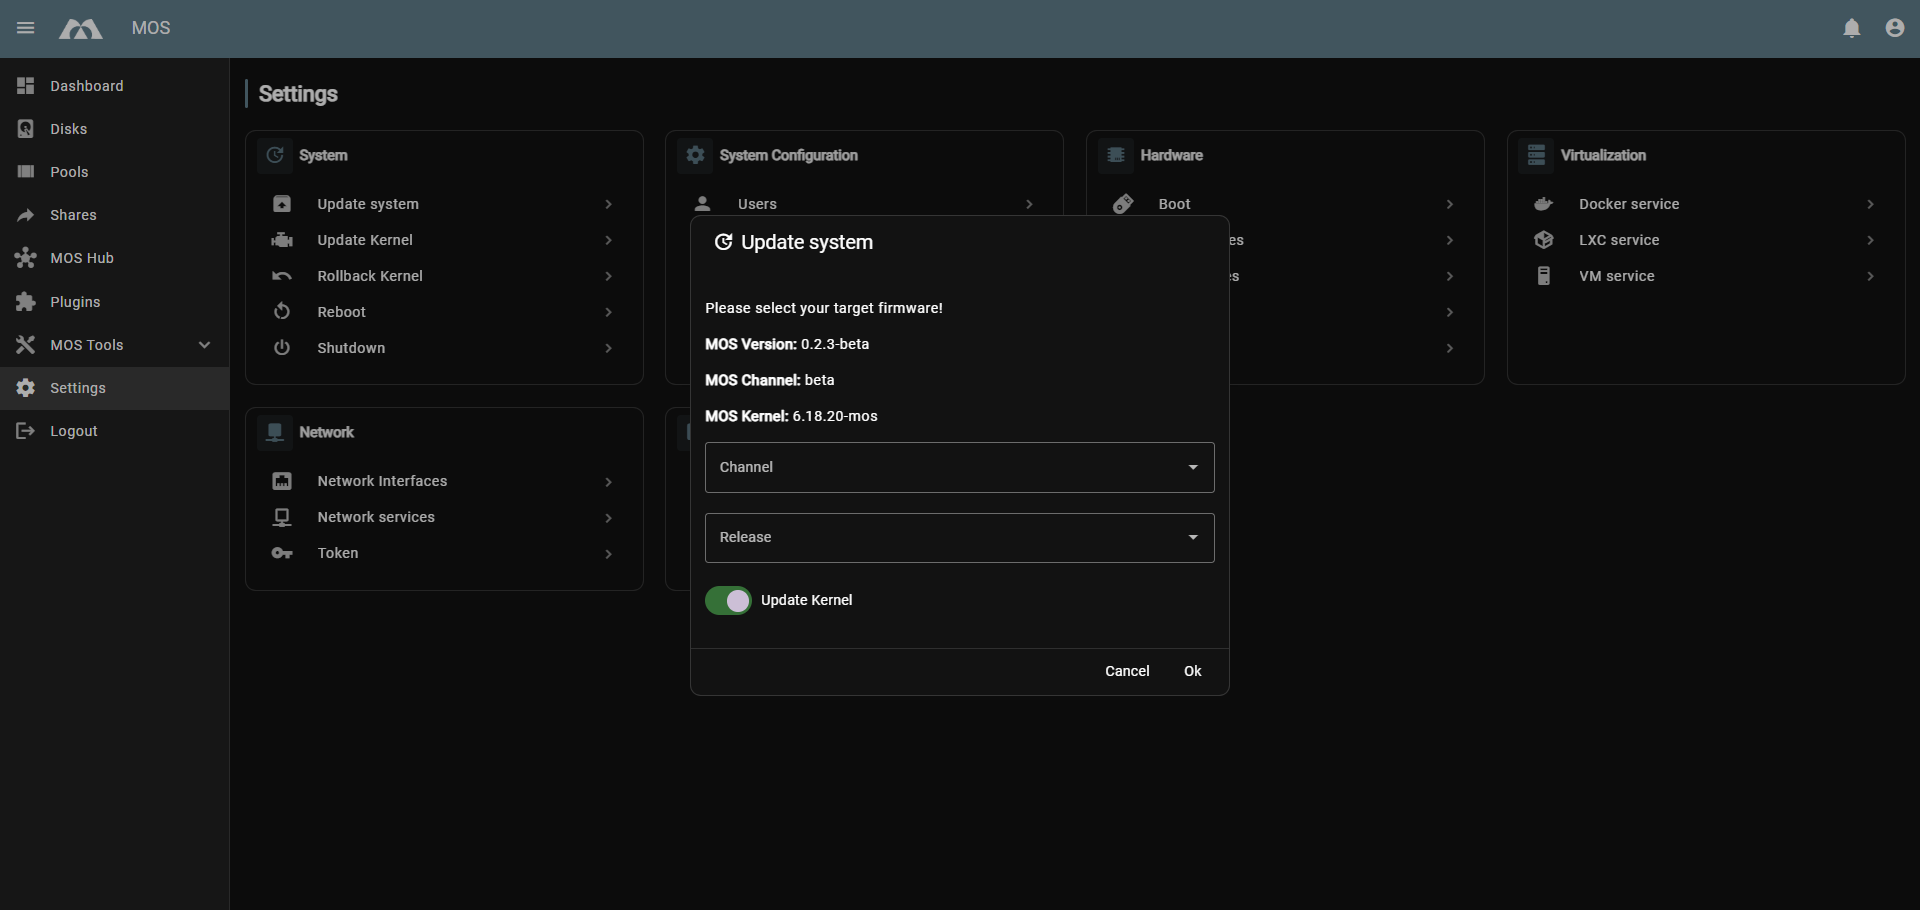
The update dialog displays:
- MOS Version — Currently installed version (e.g.,
0.2.3-beta) - MOS Channel — Current update channel (e.g.,
beta) - MOS Kernel — Current kernel version (e.g.,
6.18.20-mos)
Select your target firmware:
-
Channel — Choose the update channel:
alpha— Early access releasesbeta— Pre-release versions (selected by default)stable— Production-ready releases
-
Release — Select the specific version to install:
latest— Most recent version in the selected channel- Or choose a specific version from the list (e.g.,
0.2.3-beta,0.2.2-beta, etc.)
-
Update Kernel — Toggle to include kernel updates with the firmware update
Click Ok to start the update process, or Cancel to close the dialog without updating.
It is recommended to check for updates regularly to ensure your system has the latest security patches and features.
Parts of this documentation were created with the assistance of AI tools. All AI-generated content has undergone review, but it may still contain inaccuracies, omissions, or outdated information.