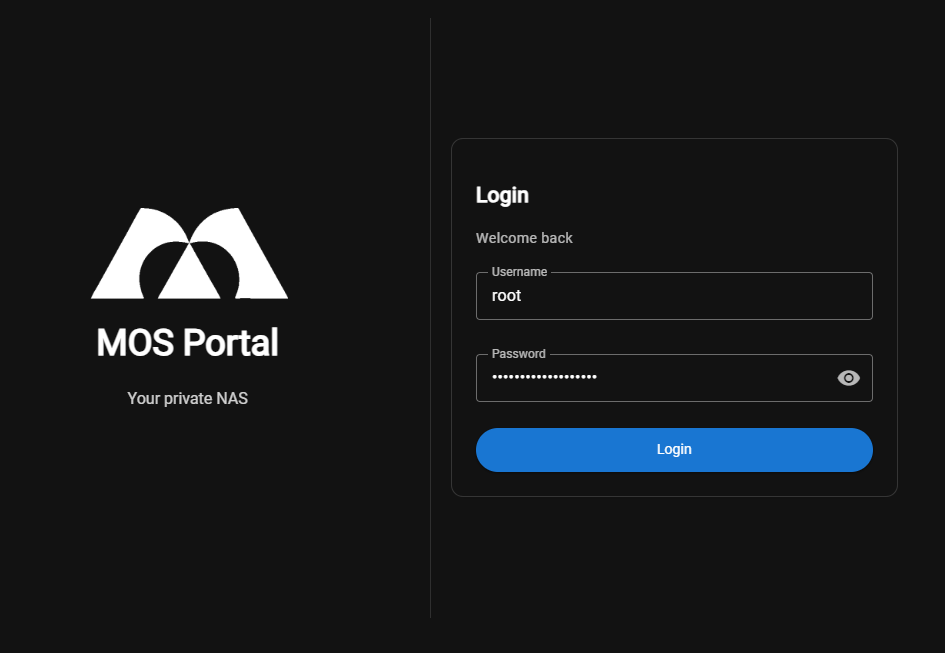
⚙️ User Profile
The User Profile menu allows you to customize your personal WebUI experience and interface preferences.
Navigate to:
User Settings → User Profile
Example:
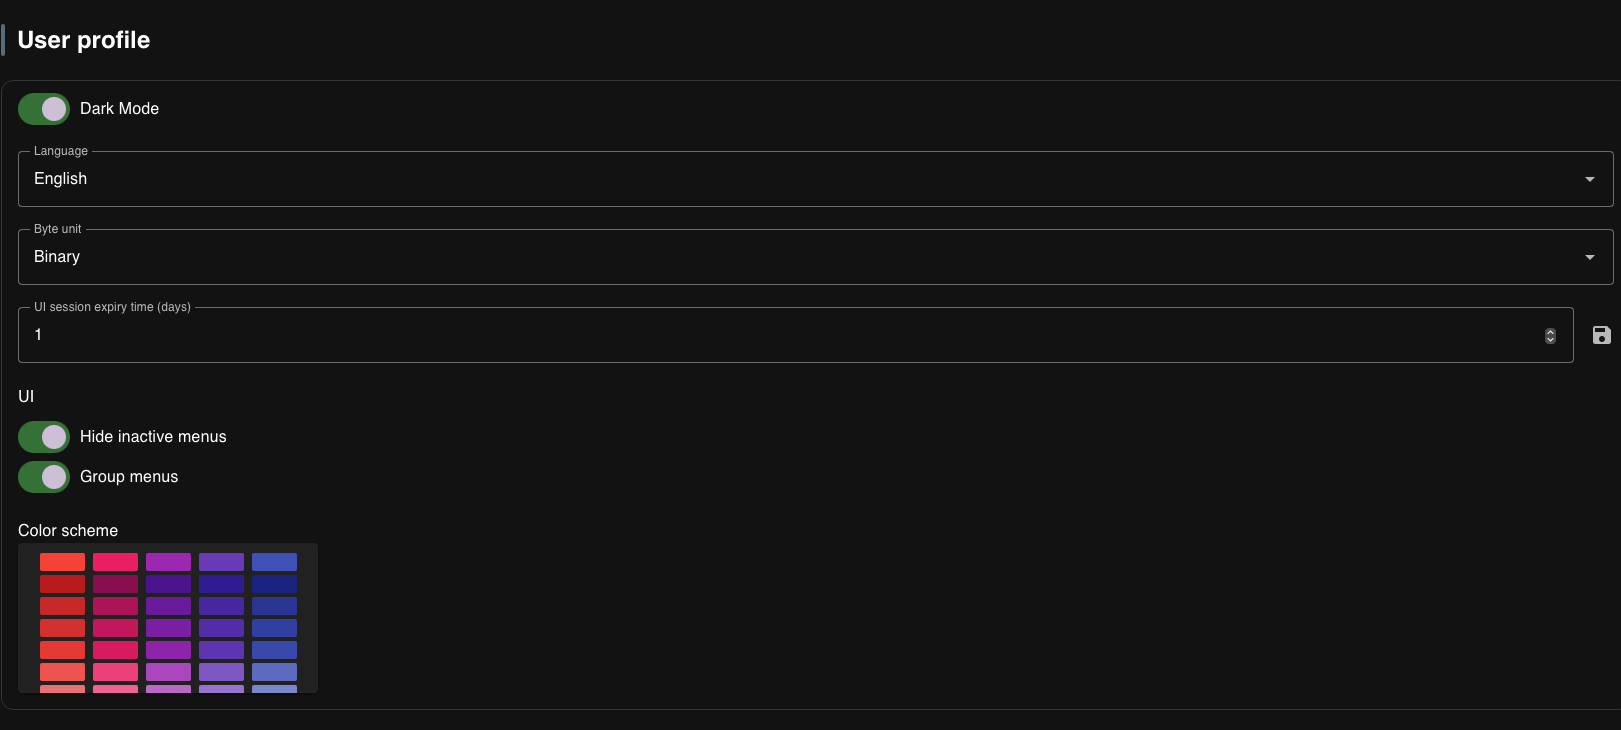
🌓 Dark Mode
Toggle between light and dark interface themes.
- Enabled: Dark theme with darker backgrounds and reduced eye strain
- Disabled: Light theme with bright backgrounds
🌐 Language
Select the interface language for the WebUI.
Available languages depend on the system configuration. The default language is English.
📊 Byte Unit
Defines how storage sizes are displayed throughout the interface.
Available options:
| Option | Description |
|---|---|
| Decimal | Uses decimal prefixes (KB = 1000 bytes, MB = 1000 KB, etc.) |
| Binary | Uses binary prefixes (KiB = 1024 bytes, MiB = 1024 KiB, etc.) |
- Decimal is more intuitive for most users (matches hard drive manufacturer specifications)
- Binary is technically more accurate for computer systems
⏱️ UI Session Expiry Time (days)
Defines how long your WebUI session remains active before requiring re-authentication.
- Default: 14 days
- Range: Typically 1-30 days
Shorter session expiry times increase security by requiring more frequent re-authentication. Longer times improve convenience but may pose a security risk if you leave your browser unattended.
🔐 MFA (Multi-Factor Authentication)
MOS supports TOTP-based Multi-Factor Authentication (MFA) to add an extra layer of security to your account. When enabled, you will need to provide a time-based one-time password (TOTP) from your authenticator app in addition to your password when logging in.
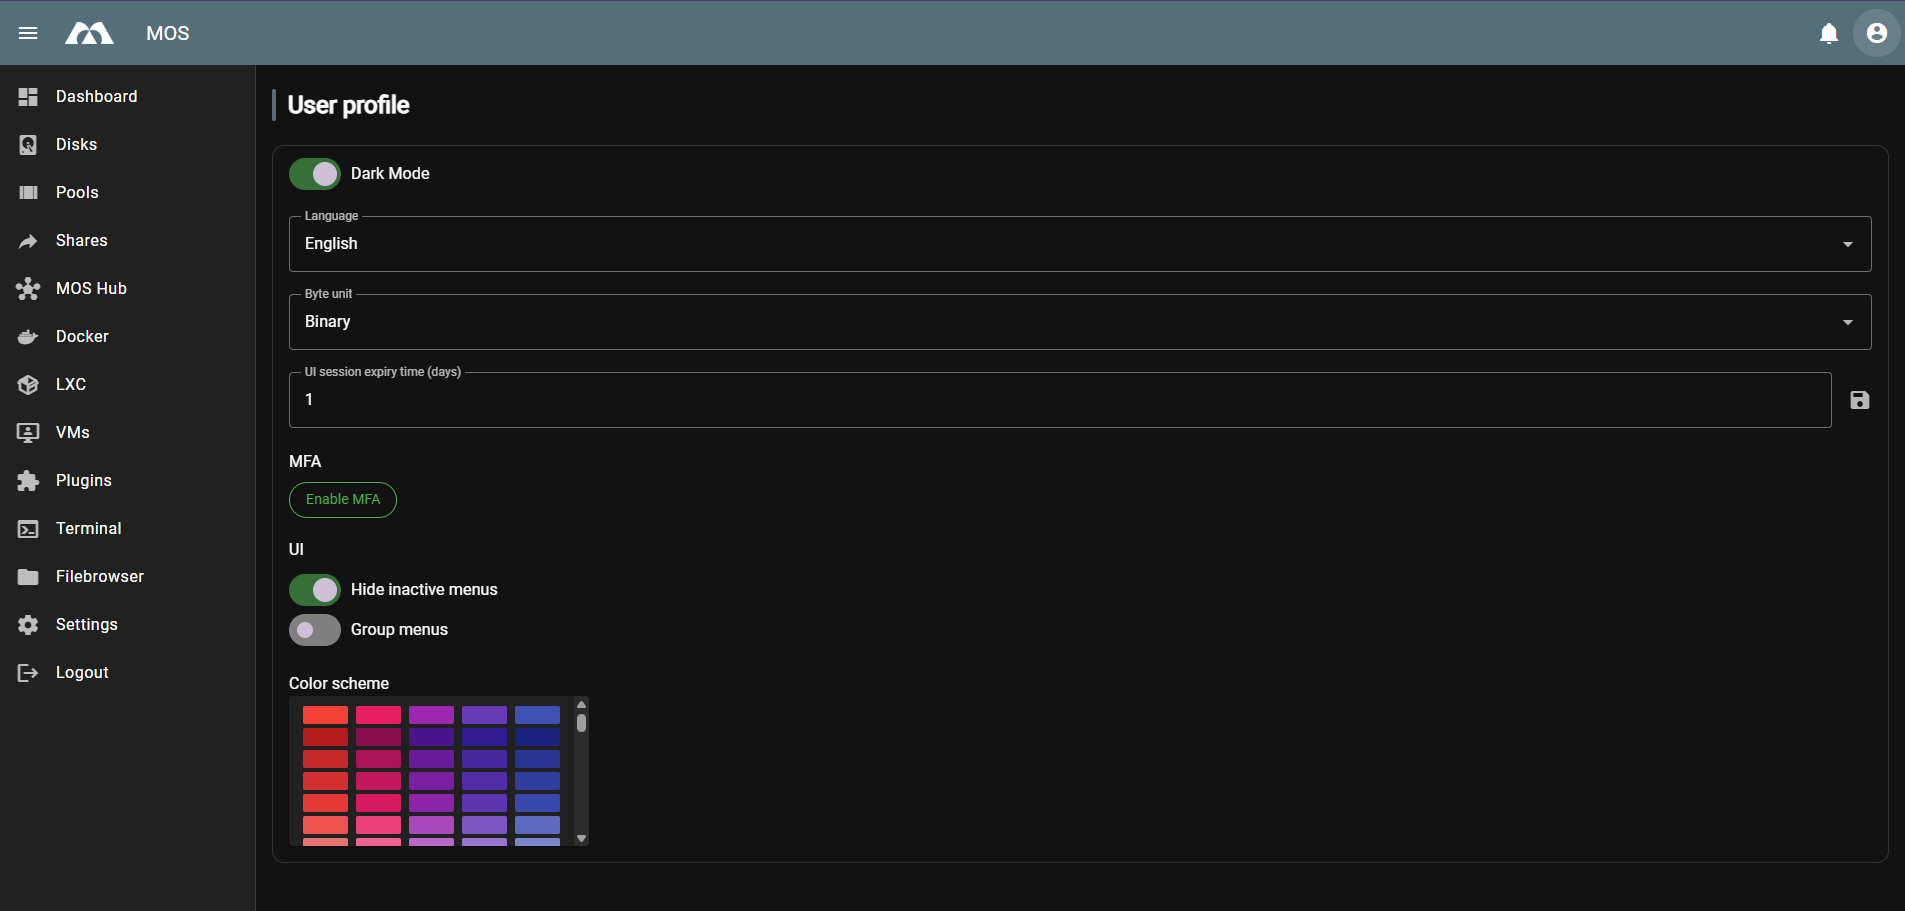
Enabling MFA
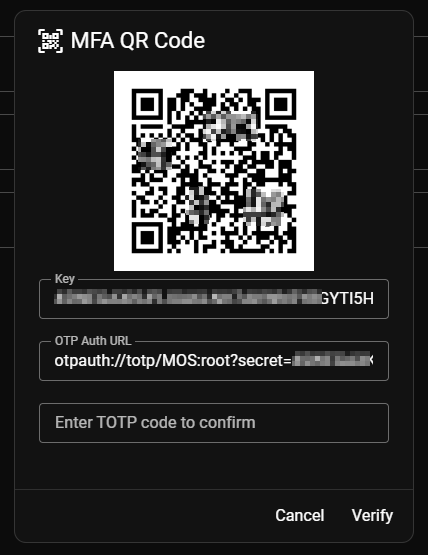
- Click Enable MFA in your User Profile
- Enter your current password to confirm:

- Scan the displayed QR code with your authenticator app (e.g., Google Authenticator, Authy, or similar)
- The dialog also displays:
- Key — The TOTP secret key (for manual entry if QR scanning fails)
- OTP Auth URL — The full authentication URL
Store the recovery codes securely. They are your only way to regain access if you lose your authenticator device.
- Enter the TOTP code from your authenticator app to verify the setup
- After successful TOTP verification, the Recovery Code will be displayed:
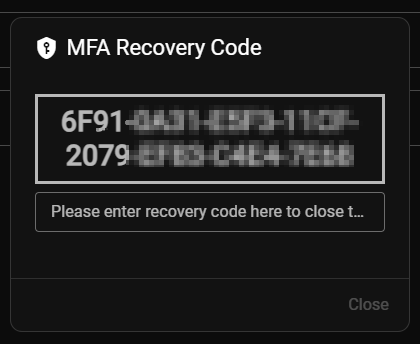
- Copy the recovery code and paste it into the input field below to confirm you have saved it
- Click Apply to complete the MFA setup
- Upon successful completion, you will see a confirmation message:

- Recovery codes can only be used once
- Using a recovery code automatically resets your MFA setup — you will need to set up MFA again
- Store recovery codes in a secure location separate from your authenticator device
- You must verify the recovery code during setup to complete MFA activation
Login with MFA
When MFA is enabled, the login process requires an additional step:
- Enter your username and password as usual
- On the Two Factor Authentication screen, enter the TOTP code from your authenticator app
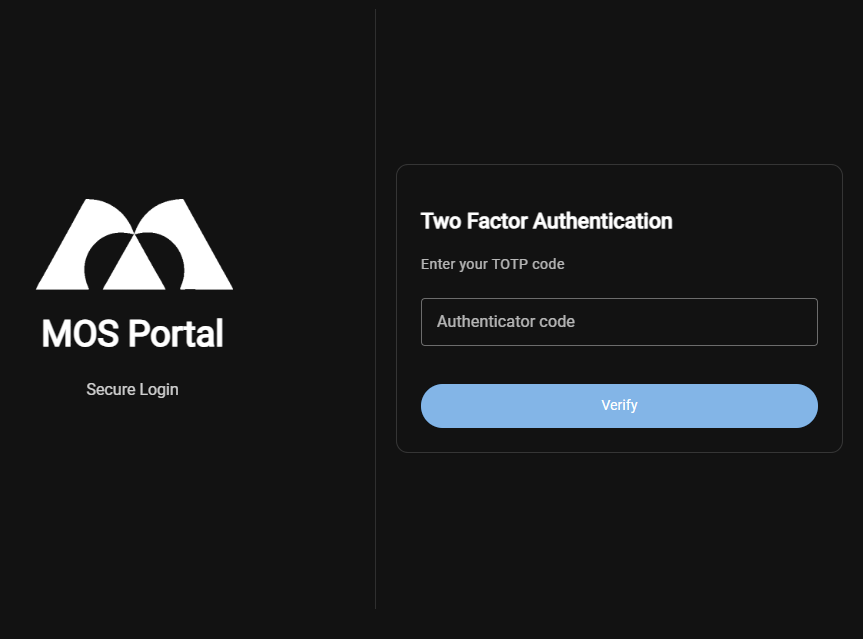
- Click Verify to complete login
Failed MFA code attempts count toward the login rate limits. After exceeding the configured maximum attempts (default: 5), your account will be temporarily blocked.
Using a Recovery Code
If you have lost access to your authenticator device, you can use a recovery code to log in.
- On the Two Factor Authentication screen, enter a recovery code instead of a TOTP code
- Click Verify to proceed
- Using a recovery code immediately disables MFA on your account
- The recovery code can only be used once and is invalidated after use
- After logging in, you will see a notification that MFA has been disabled

You must set up MFA again in your User Profile to restore the additional security layer.
Common Errors
Invalid MFA Code
If you enter an incorrect TOTP code, you will see an error message:

Troubleshooting:
- Ensure your device's clock is synchronized correctly
- Wait for a new code to be generated (codes change every 30 seconds)
- Double-check you are using the correct authenticator app
Disabling MFA
To disable MFA:
- Click Disable MFA in your User Profile
- Enter your password to confirm:

- Upon successful confirmation, MFA will be disabled

Disabling MFA removes the additional security layer. Only disable MFA if absolutely necessary and ensure your password is strong.
🧹 Hide Inactive Menus
Controls the visibility of menu items for features that are not currently active or configured.
- Enabled: Menu items for inactive features are hidden from the left navigation
- Disabled: All menu items are shown, even if the corresponding feature is not active
- Enable this option for a cleaner interface that only shows relevant menu items
- Disable this option to see all available features and explore the full interface
📁 Group Menus
Organizes the left navigation menu into collapsible groups.
- Enabled: Menu items are grouped into categories (Storage, Network Access, Virtualization, MOS Tools, etc.)
- Disabled: All menu items are displayed in a flat list
Grouped menus help organize large systems with many features enabled.
🎨 Color Scheme
Select a custom accent color for the WebUI interface.
The color scheme affects:
- Active menu highlights
- Button accents
- Chart and graph colors
- Selection indicators
Choose from the available color palette to personalize your interface.
✅ Summary
The User Profile settings allow you to customize your MOS experience:
| Setting | Purpose |
|---|---|
| Dark Mode | Switch between light and dark themes |
| Language | Set interface language |
| Byte Unit | Choose decimal or binary size display |
| Session Expiry | Control session timeout duration |
| MFA | Enable/disable Multi-Factor Authentication |
| Hide Inactive Menus | Show/hide menus for inactive features |
| Group Menus | Organize navigation into groups |
| Color Scheme | Personalize interface accent color |
These settings are stored per-user and do not affect other users on the system.
Parts of this documentation were created with the assistance of AI tools. All AI-generated content has undergone review, but it may still contain inaccuracies, omissions, or outdated information.