🖥️ Create the First VM
MOS supports running full virtual machines (VMs) using KVM/QEMU.
This guide walks you through creating and configuring your first VM.
Before you can create a VM, you must first enable the VM Service in the settings. Navigate to Settings → Virtualization → VM Service and enable the service. For more details, refer to the VM Service documentation.
Navigate to:
VMs
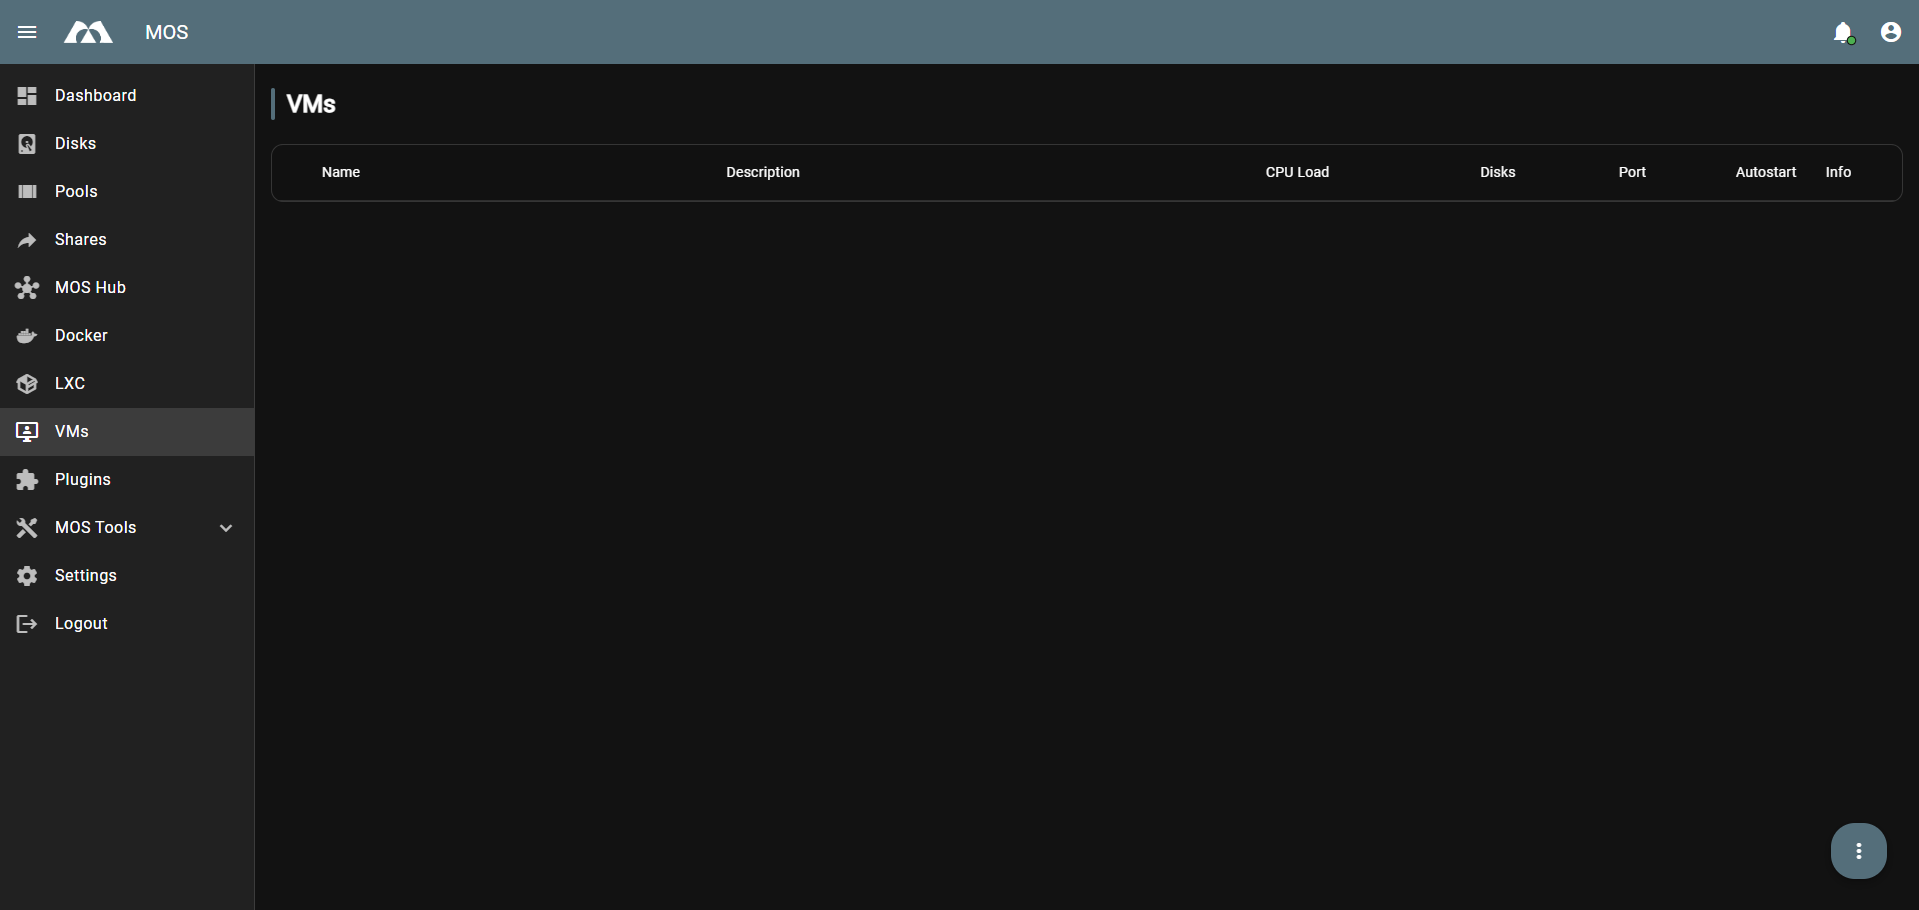
➕ Creating a VM
Click the three-dot menu (⋮) in the bottom right corner and select + Create VM.

⚙️ Basic Configuration
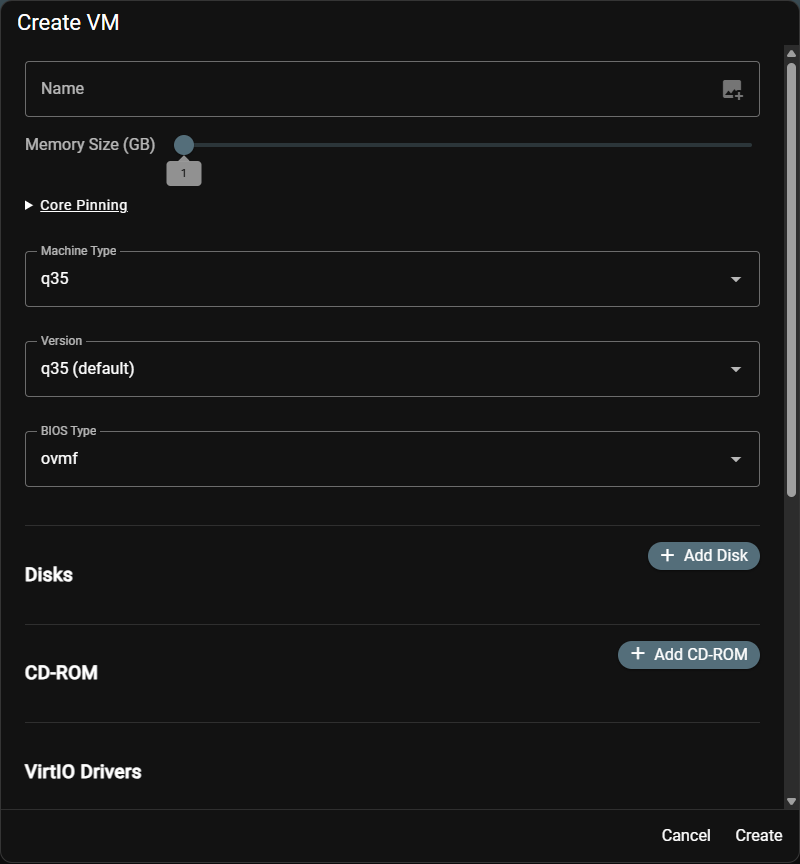
🏷️ Name
The unique name for your VM as it appears in the overview.
Best practices:
- Use short, descriptive names
- Avoid spaces and special characters
🧠 Memory Size (GB)
Defines how much RAM is allocated to the VM.
Use the slider to set the desired memory size in GB.
Only allocate as much memory as the VM actually needs to avoid starving the host system.
📌 Core Pinning
Allows pinning vCPUs to specific physical CPU cores.
Useful for performance-critical VMs to reduce CPU scheduling overhead.
🖥️ Machine Type
Defines the emulated machine architecture.
| Option | Description |
|---|---|
q35 | Modern PCIe-based machine (recommended) |
pc | Legacy i440FX machine |
🔢 Version
Defines the version of the selected machine type.
Example: q35 (default)
🔧 BIOS Type
Defines the firmware used to boot the VM.
| Option | Description |
|---|---|
ovmf | UEFI firmware (recommended for modern OS) |
seabios | Legacy BIOS |
Use ovmf for Windows 11 and modern Linux distributions that require UEFI.
💾 Disks
Click + Add Disk to add a virtual disk to the VM.

Disk Configuration Fields
| Field | Description |
|---|---|
| Source | Path to the disk image file (e.g. /mnt/main/vms/Test/vdisk1.qcow2) |
| Size | Size of the virtual disk |
| Bus | Controller type used for the disk |
| Format | Disk image format |
| Boot Order | Boot priority (lower = higher priority) |
🚌 Disk Bus Options

| Bus | Description |
|---|---|
virtio | Best performance (recommended for Linux) |
sata | Good compatibility |
usb | USB-attached disk |
scsi | SCSI controller |
ide | Legacy, slowest option |
🗄️ Disk Format Options

| Format | Description |
|---|---|
qcow2 | Supports snapshots, thin provisioning (recommended) |
raw | Maximum performance, no snapshot support |
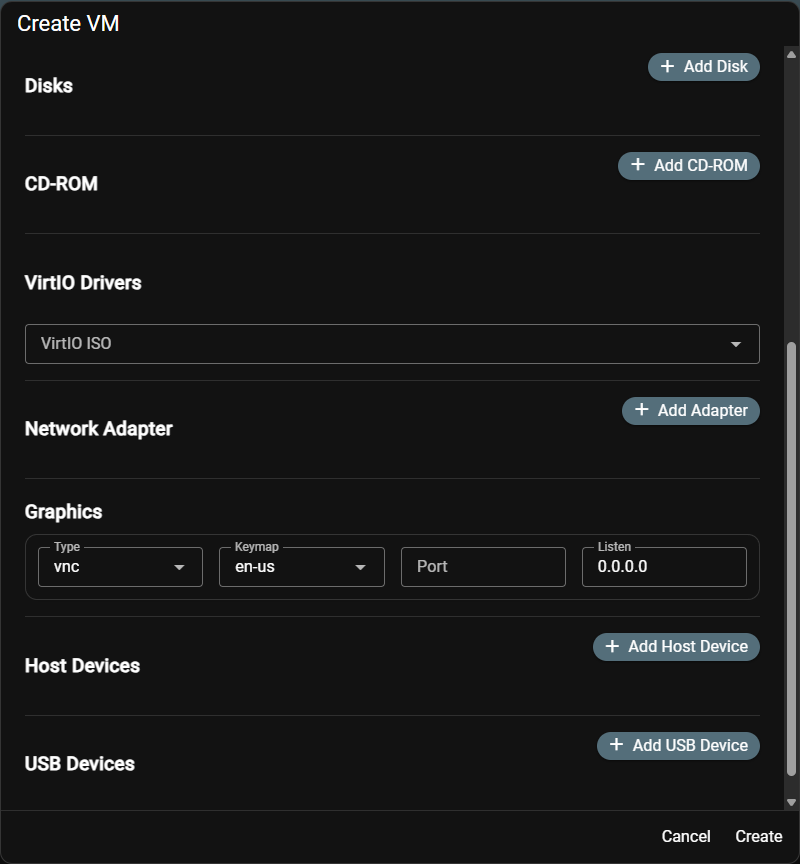
💿 CD-ROM
Click + Add CD-ROM to attach an ISO image as a virtual optical drive.
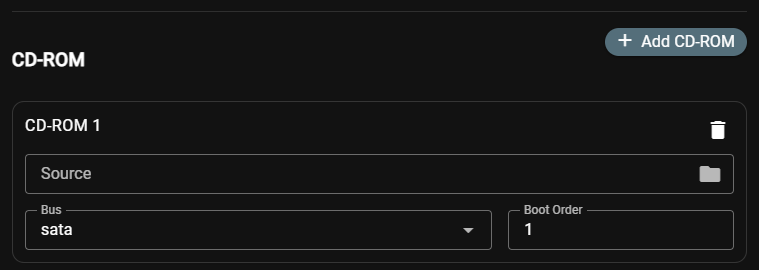
CD-ROM Configuration Fields
| Field | Description |
|---|---|
| Source | Path to the ISO file |
| Bus | Controller type for the CD-ROM |
| Boot Order | Boot priority |
CD-ROM Bus Options

Available options: virtio, sata (default), usb, scsi, ide
Use sata for best OS installer compatibility.
🪟 VirtIO Drivers
For Windows VMs, VirtIO drivers are required to use virtio disks and network adapters.
Select the VirtIO ISO from the dropdown to attach the driver disk.
The VirtIO ISO must be downloaded and placed on the system beforehand. It provides drivers for disk controllers, network adapters, and more inside Windows VMs.

🌐 Network Adapter
Click + Add Adapter to add a virtual network interface.
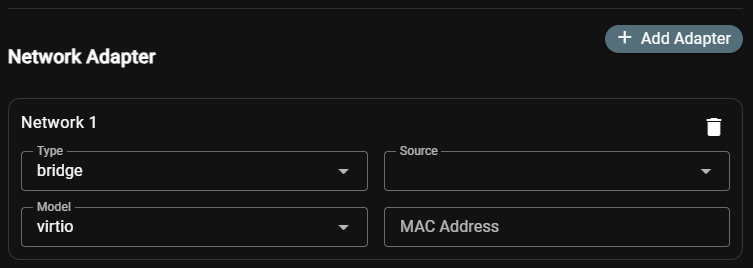
Network Configuration Fields
| Field | Description |
|---|---|
| Type | Network connection type |
| Source | Network bridge or interface to connect to |
| Model | Virtual NIC model |
| MAC Address | Optional static MAC address |
🔗 Network Type Options
| Type | Description |
|---|---|
bridge | Connects VM to a host bridge (most common) |
macvtap | Direct connection via macvtap interface |
network | Uses a libvirt virtual network |
📡 Network Source Options
| Source | Description |
|---|---|
br0 | Physical network bridge (for real network access) |
virbr0 | Virtual NAT bridge (isolated network) |
🖧 Network Model Options
| Model | Description |
|---|---|
virtio | Best performance (recommended) |
e1000 | Intel Gigabit emulation, good compatibility |
rtl8139 | Legacy, broadest compatibility |
🖼️ Graphics
Defines how the VM's display is accessed remotely.
Graphics Configuration Fields
| Field | Description |
|---|---|
| Type | Remote display protocol |
| Keymap | Keyboard layout used inside the VM |
| Port | Port for remote display connection (leave empty for auto) |
| Listen | IP address to listen on (0.0.0.0 = all interfaces) |
🖥️ Graphics Type Options
| Type | Description |
|---|---|
vnc | Basic remote display (default, widely supported) |
spice | Advanced protocol with better performance and USB redirection |
none | No graphical output |
⌨️ Keymap Options
Select the keyboard layout that matches your physical keyboard:
en-us, en-gb, de, de-ch, fr, fr-be, and more.
🔌 Host Devices
Click + Add Host Device to pass through a physical PCI device directly to the VM.

PCI passthrough gives the VM exclusive access to the device. The host will no longer be able to use it while the VM is running.
Common use cases:
- GPU passthrough for gaming VMs
- Dedicated network card passthrough
- NVMe/storage controller passthrough
🔌 USB Devices
Click + Add USB Device to pass through a connected USB device to the VM.
Select the USB device from the dropdown — all currently connected USB devices are listed.

Examples of passthrough devices:
- Bluetooth adapters
- USB flash drives
- Input devices
USB passthrough requires the device to be physically connected to the host at VM start time.
✅ Finalizing the VM
Once all settings are configured, click Create to create the VM.
The new VM will appear in the VMs overview with a stopped state.
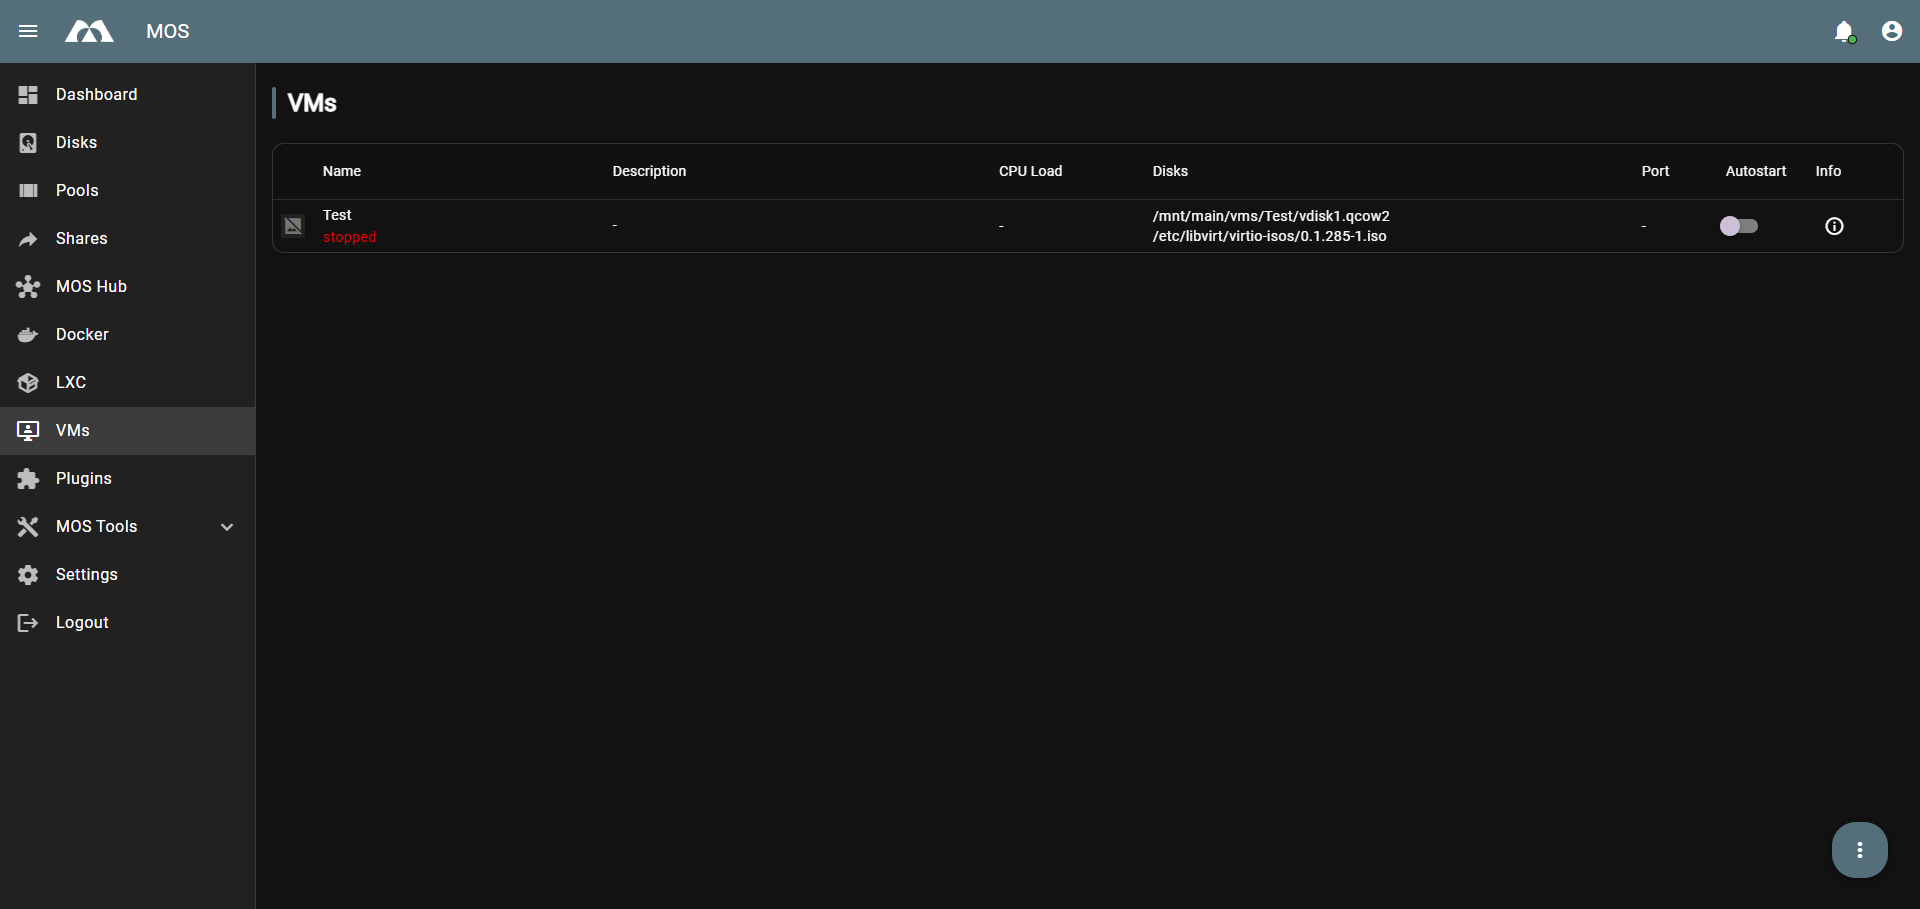
📋 VM Overview Columns
| Column | Description |
|---|---|
| Name | VM name and current state |
| Description | Optional description |
| CPU Load | Live CPU usage while running |
| Disks | Attached disk and ISO paths |
| Port | VNC/SPICE port for remote access |
| Autostart | Whether the VM starts automatically on boot |
| Info | Additional VM information |
✅ Summary
To create your first VM, follow these steps:
- Set a Name and configure Memory
- Choose Machine Type and BIOS Type
- Add a Disk and select format + bus type
- Add a CD-ROM with the OS installer ISO
- (Windows only) Attach the VirtIO ISO
- Add a Network Adapter
- Configure Graphics for remote access
- (Optional) Add Host Devices or USB Devices
- Click Create — your VM is ready!
Parts of this documentation were created with the assistance of AI tools. All AI-generated content has undergone review, but it may still contain inaccuracies, omissions, or outdated information.